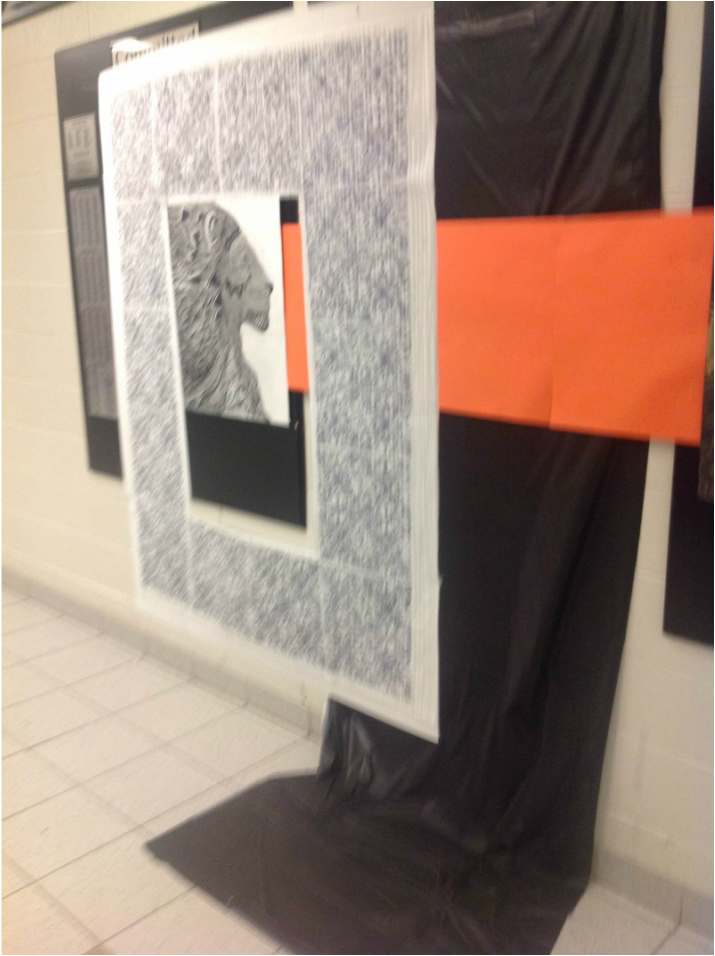
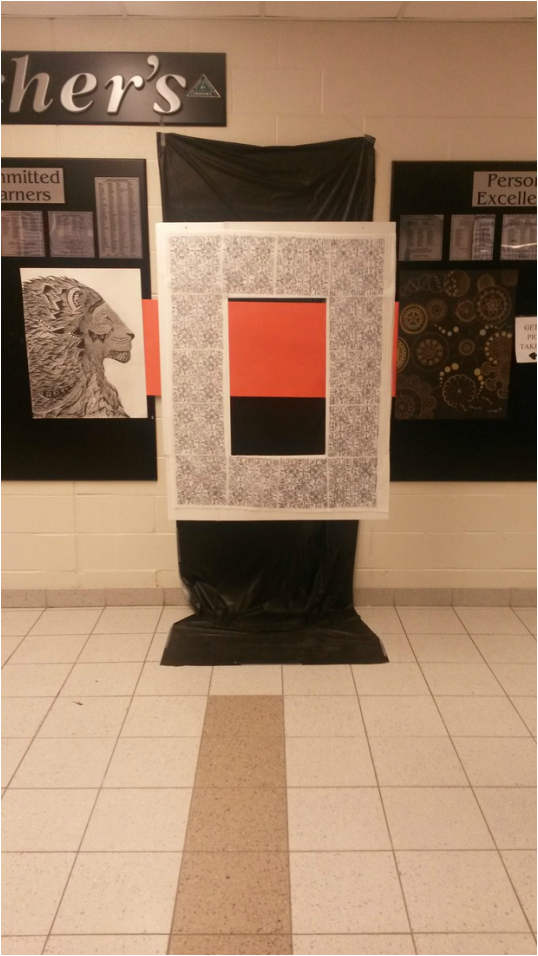
ARTWORK INSTALLATION


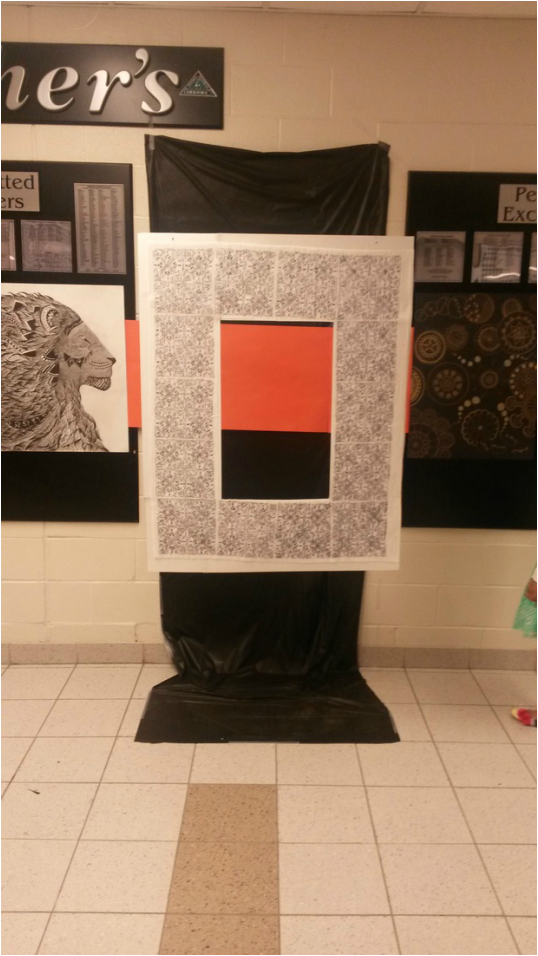
ARTWORK # 5
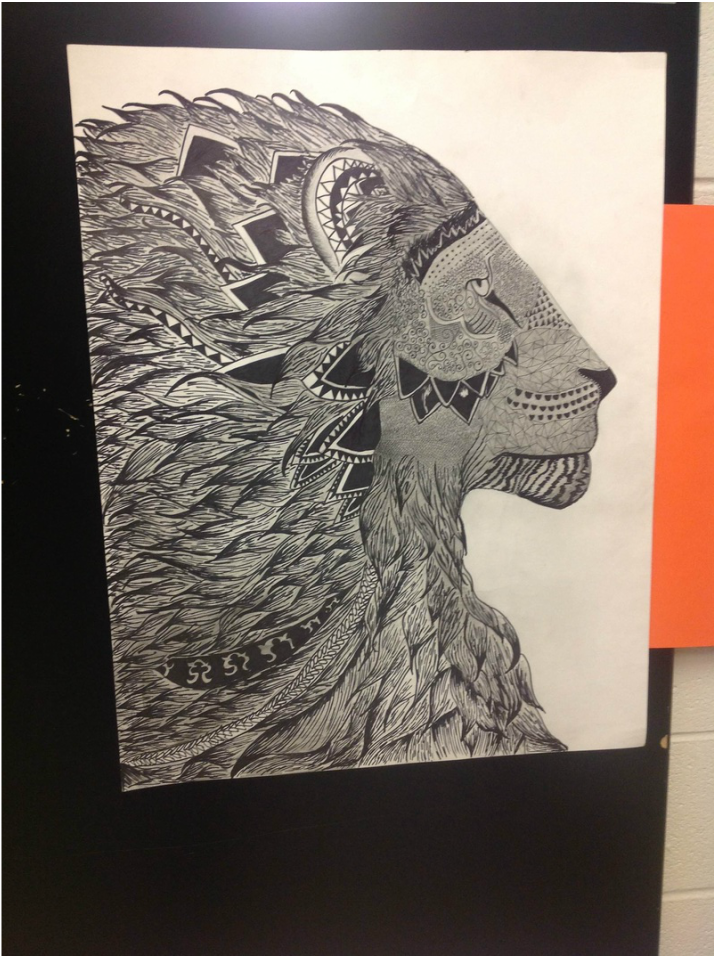
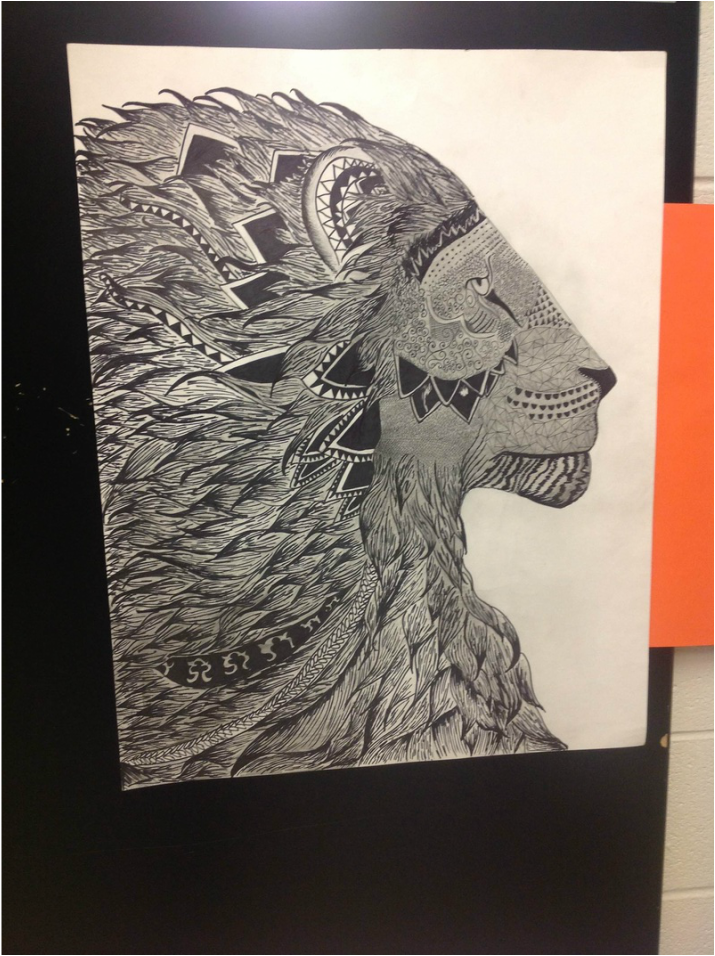
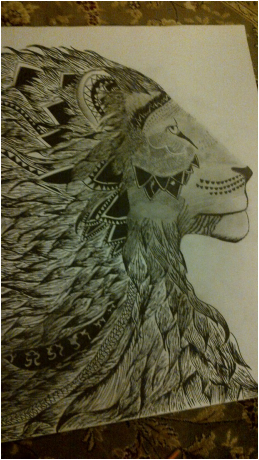
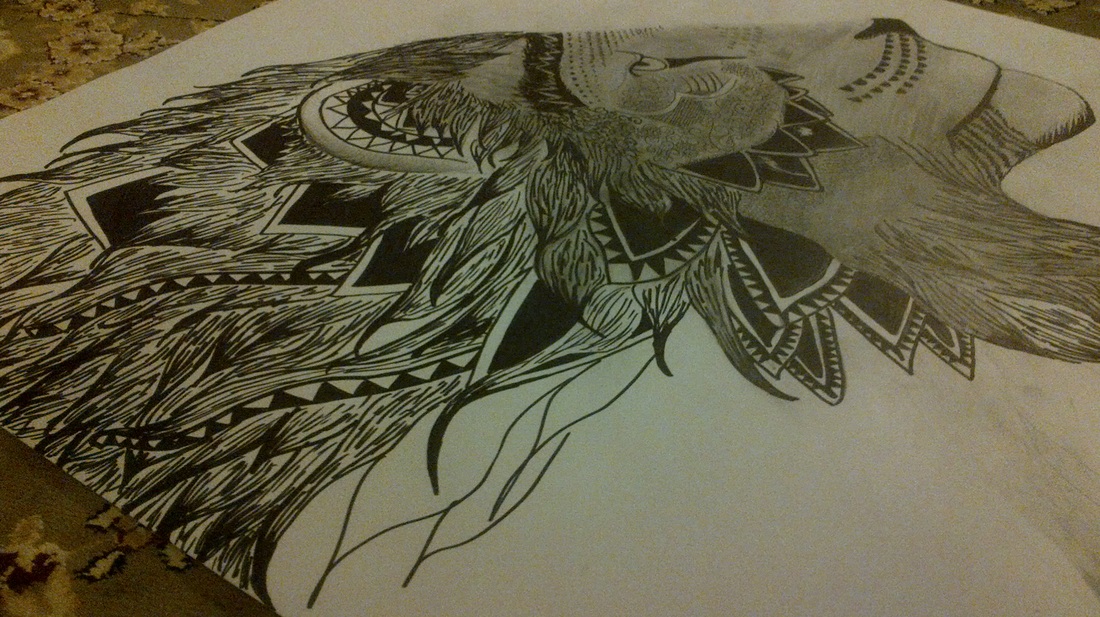
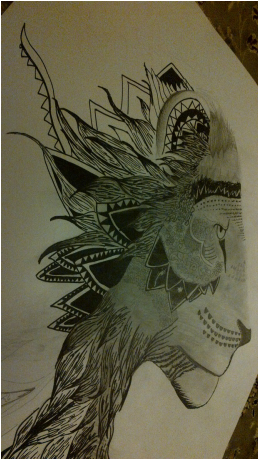
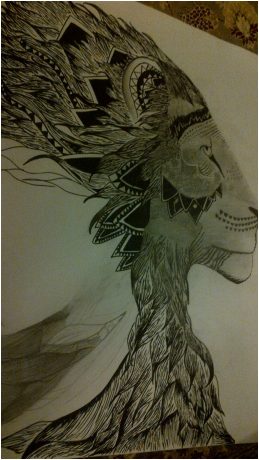
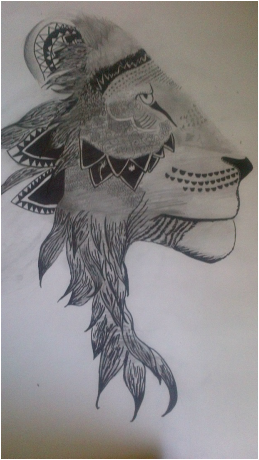
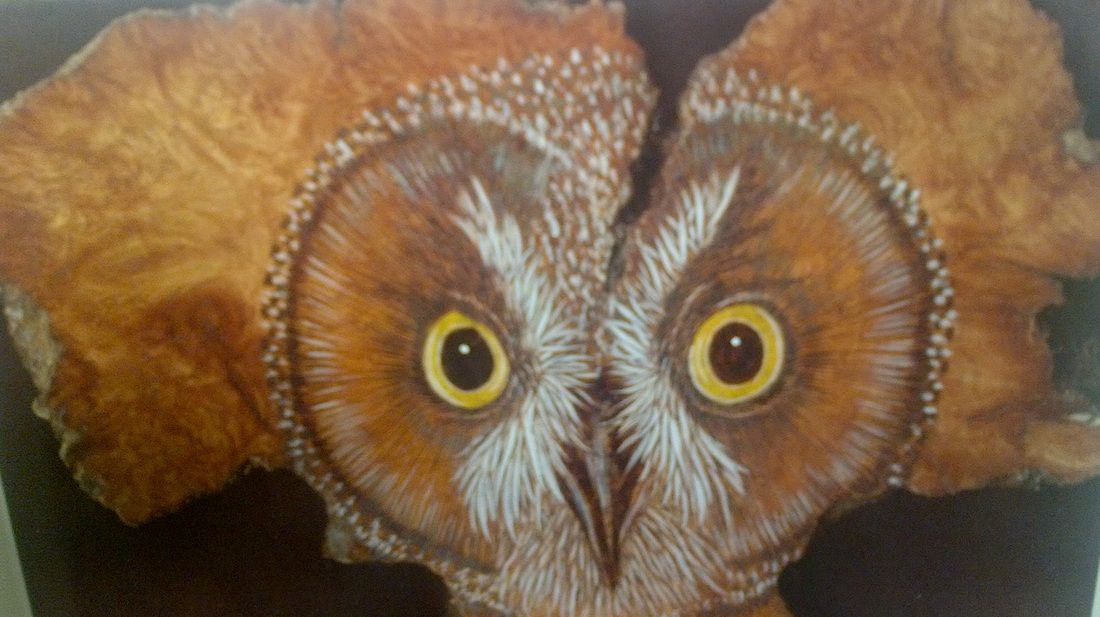
I added in the rest of the detail within the face, and did some more toning here and there. I am now OFFICIALLY FINISHED!

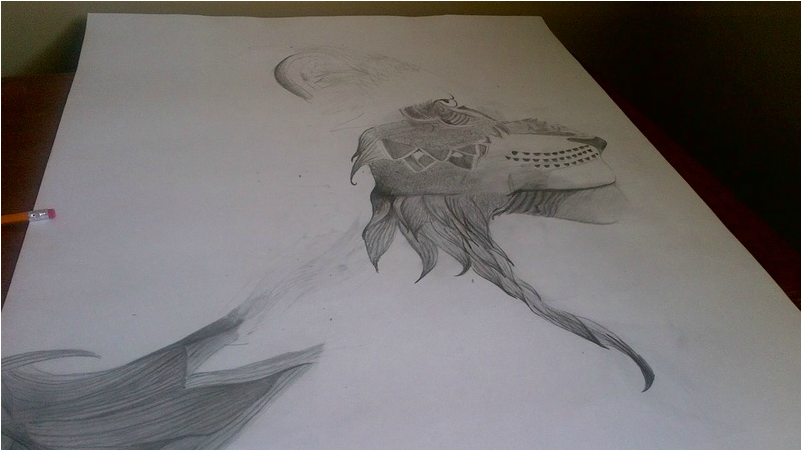
FINISHED just a few more touches and I will truly be finished. Finally! STILL HAVE TO DO SOMETHING ABOUT THE FACE.
|
|
MORE SHADING IN, HAVE TO DO SOMETHING ABOUT THE FACE.
|
|
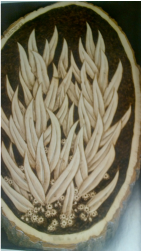
I have finished the whole piece just have to go in and add finishing touches.
|
|
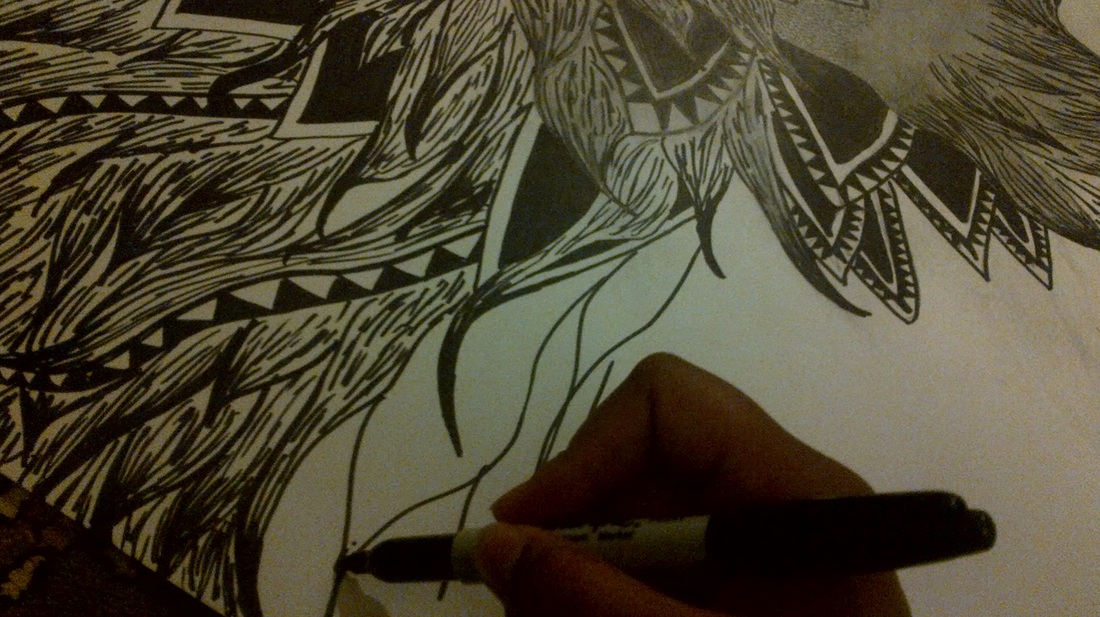
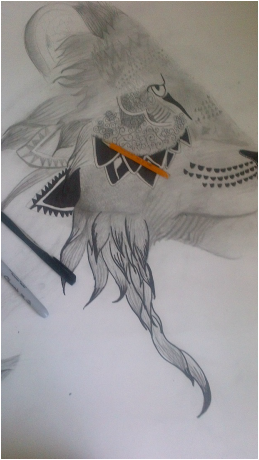
I am almost finished, I still need to go ahead and finished the rest with the sharpie and then go in with a thin sharpie tip for the detail. I also have to add in the pencil shading as that really helps as well. I really wish I had several different size Sharpies, but I have to make do with what I have.
|
|
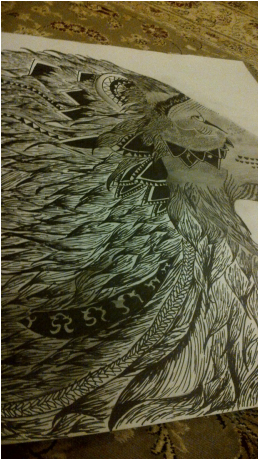
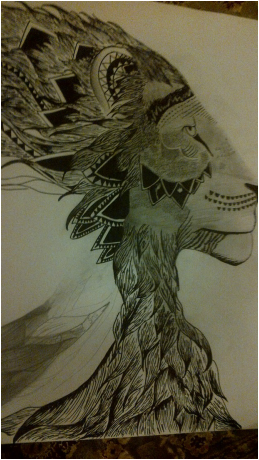
I have added more tribal pattern like things, and it is coming out great and is actually beginning to look like a tribal lion.
|
|
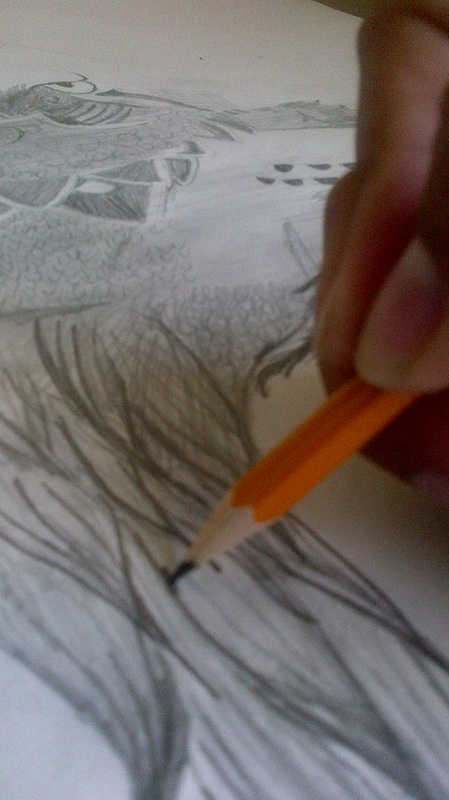
I have started going in with the sharpie marker, and I think its looking good, so I need to keep at it, because I am going in with the sharpie as well I need to do double the work which is taking me double the time.
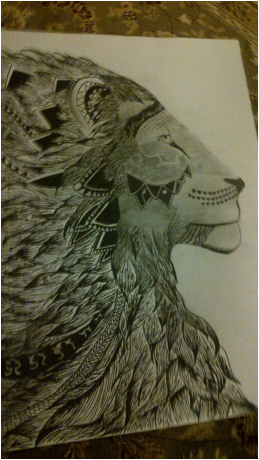
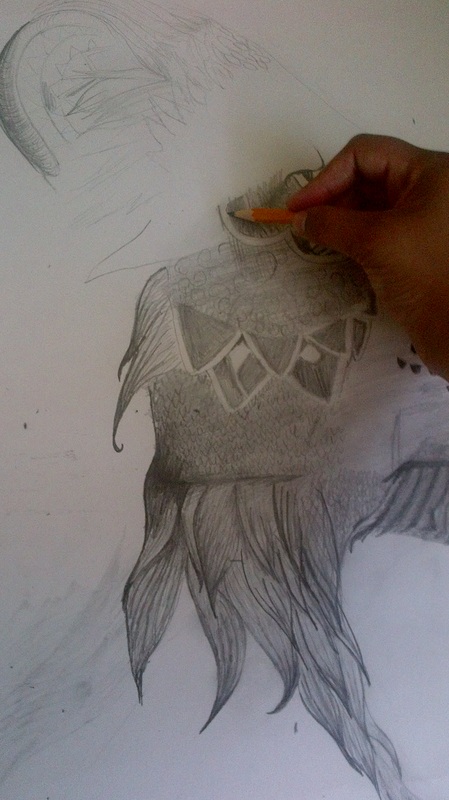
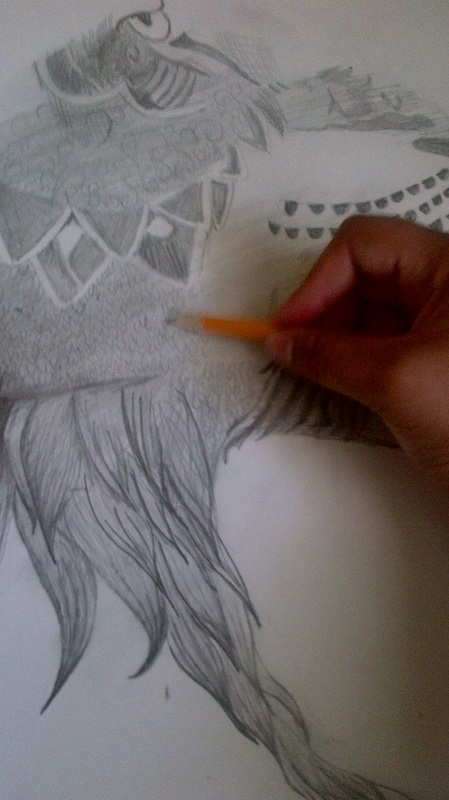
Still working on the face, it is taking a super long time because of the excess amount of detail.
|
|
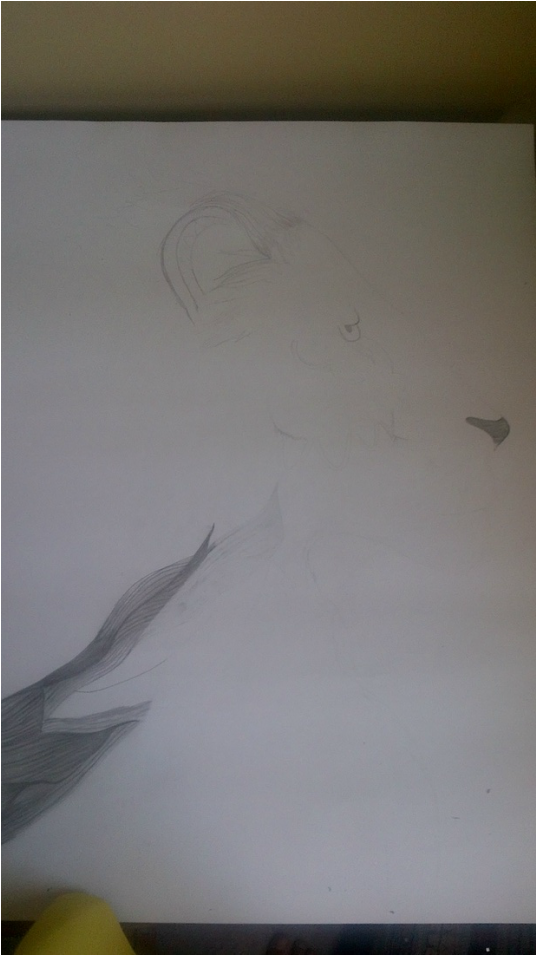
I am trying to add in the dark's and lights to show the contrast, the pencil is not really working, I am going to have to come in with a sharpie marker soon.
|
|
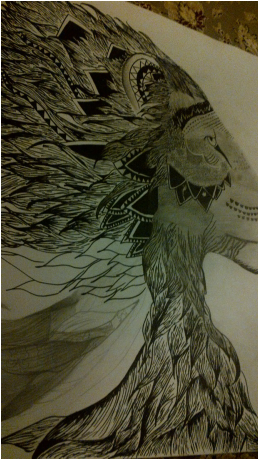
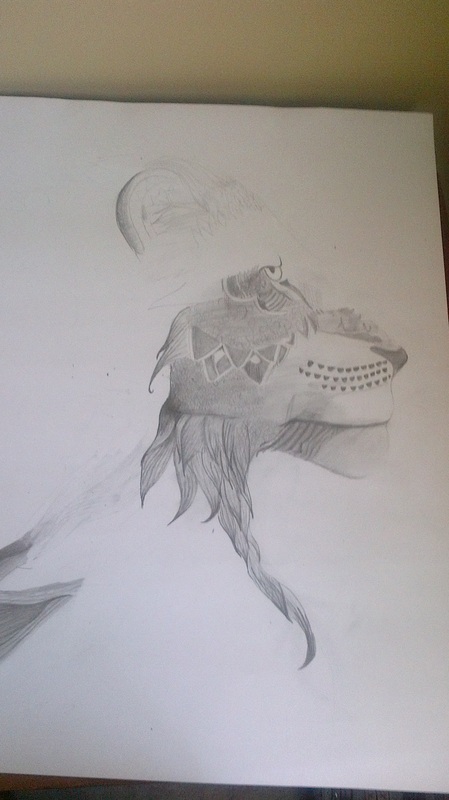
I am currently working on the face of the lion, trying to get in as much detail as I can, I also have started a little on the shading as well. We can also see the start of the tribal patterns as well. So far its going okay.
My last and final piece is going to be a lion made from tribal patterns, in tribal patterns we see a lot of great shapes, patterns and designs and I thought that would be a great way of ending off all my pieces with a graphite/sharpie drawing because it will really bring out my theme. I have done a basic out line and have begun to start drswing in the features of the lion.
Artwork # 4

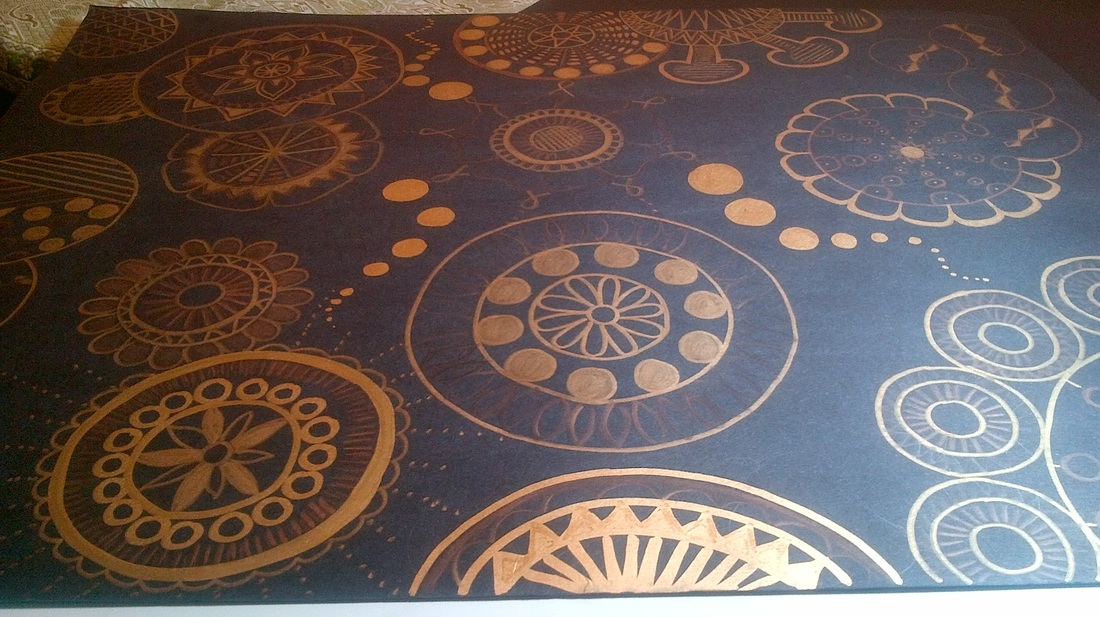
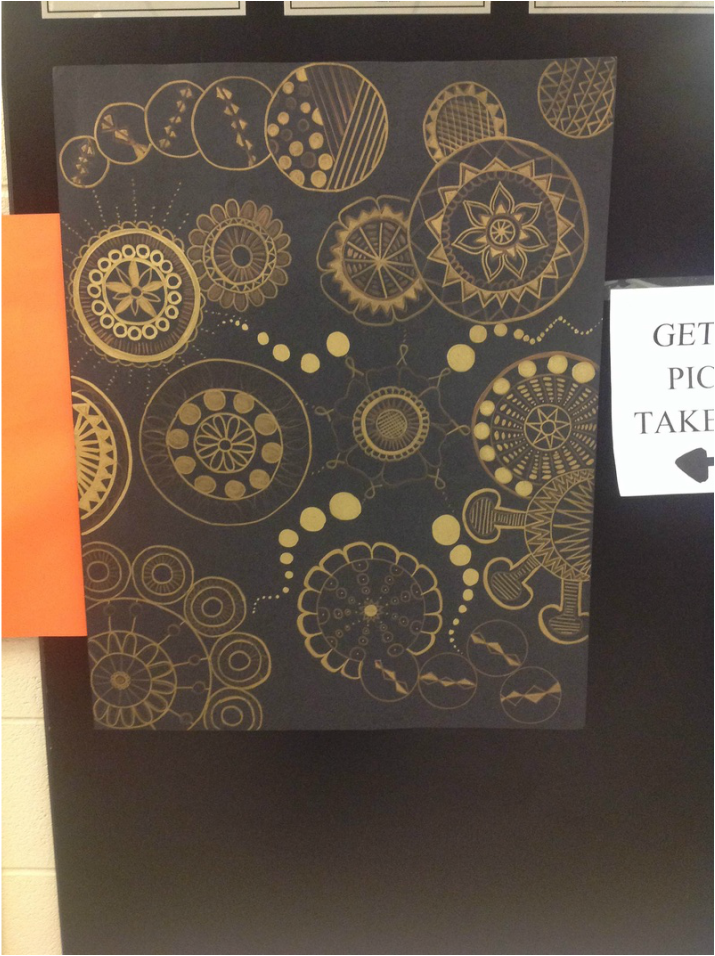
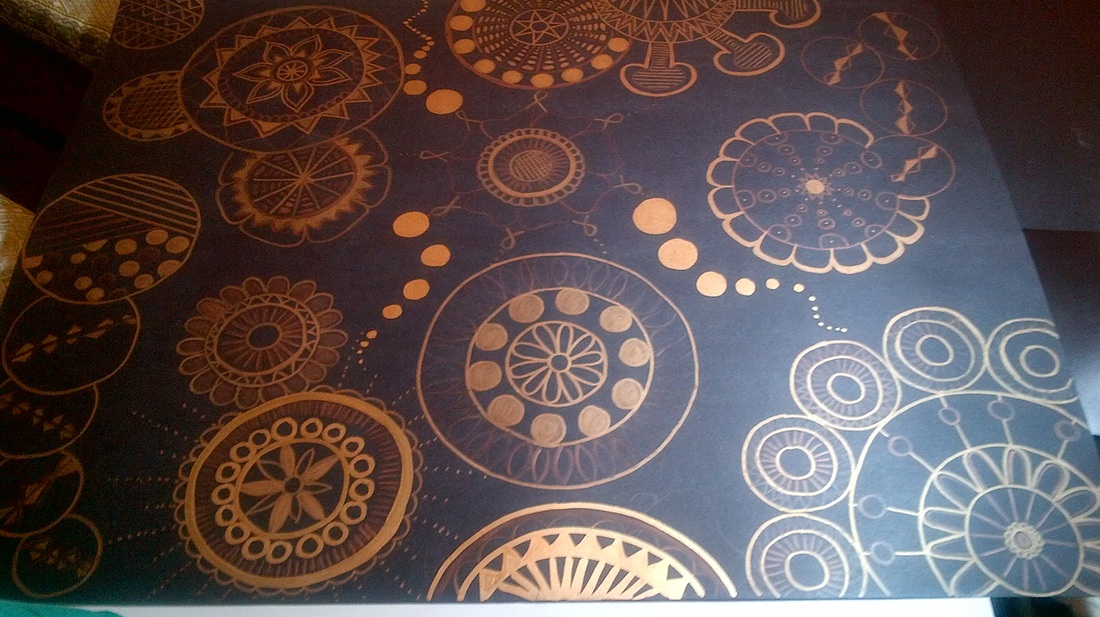
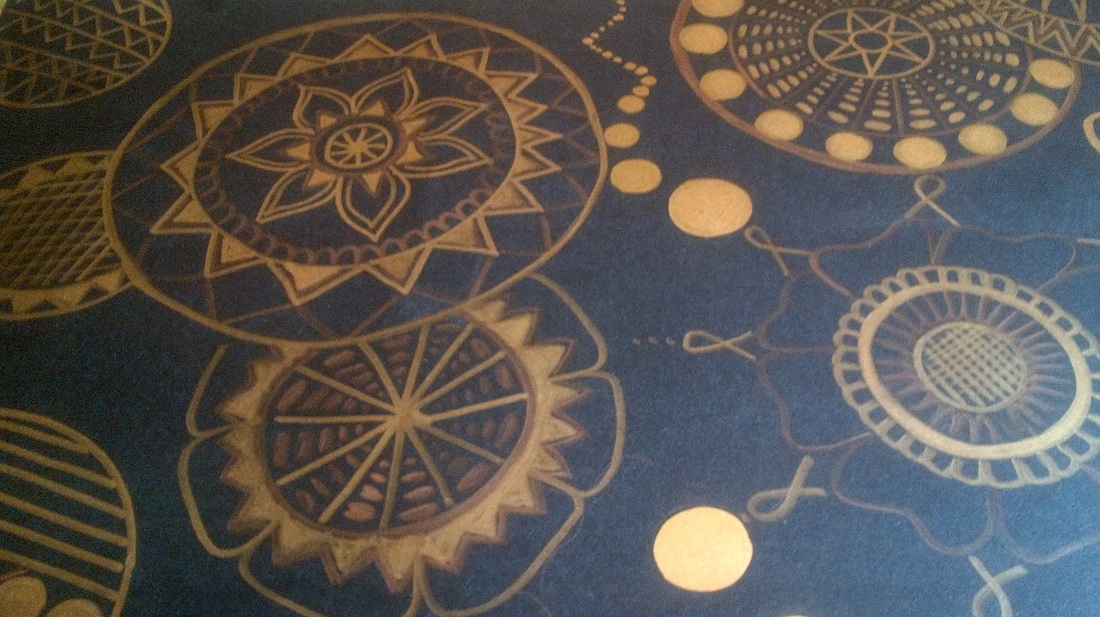
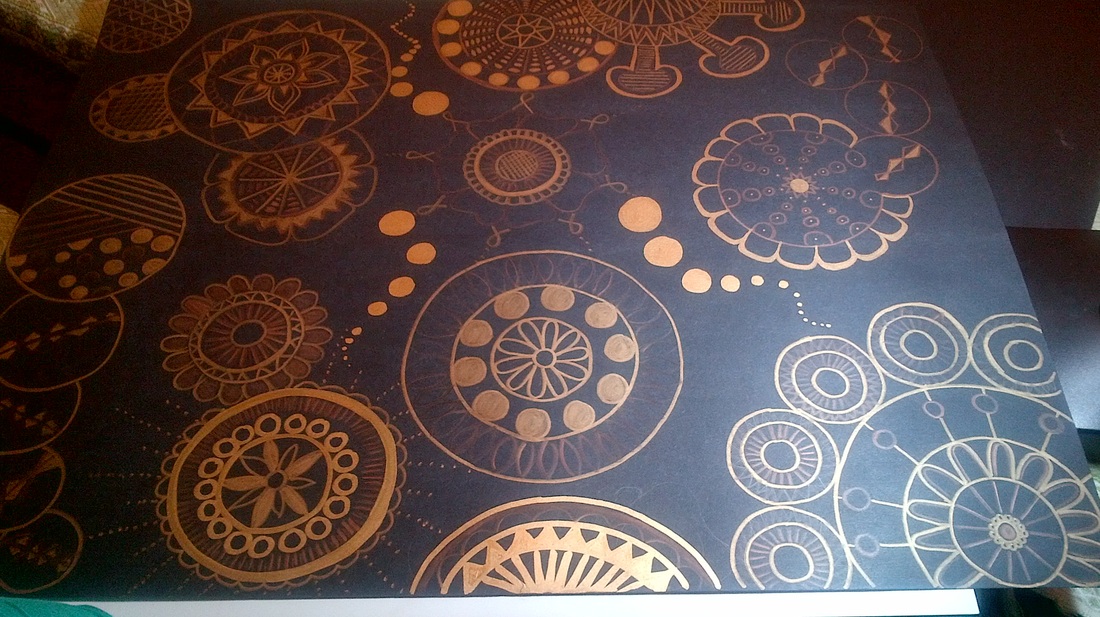
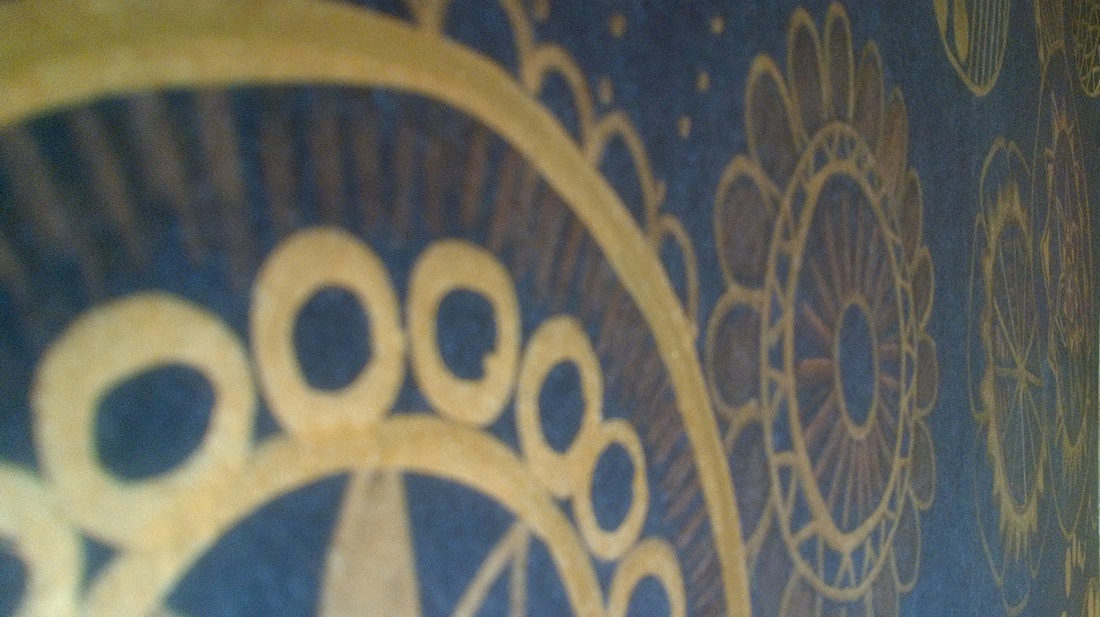
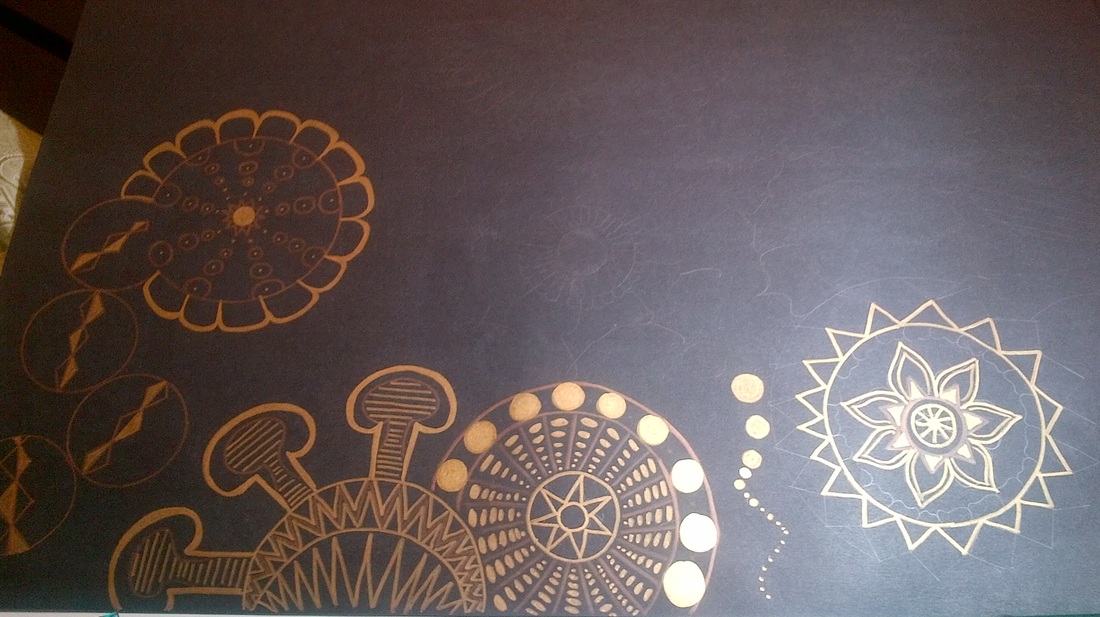
FINISHED with my bronze marker just making it through!

|
|
|

|
|
|
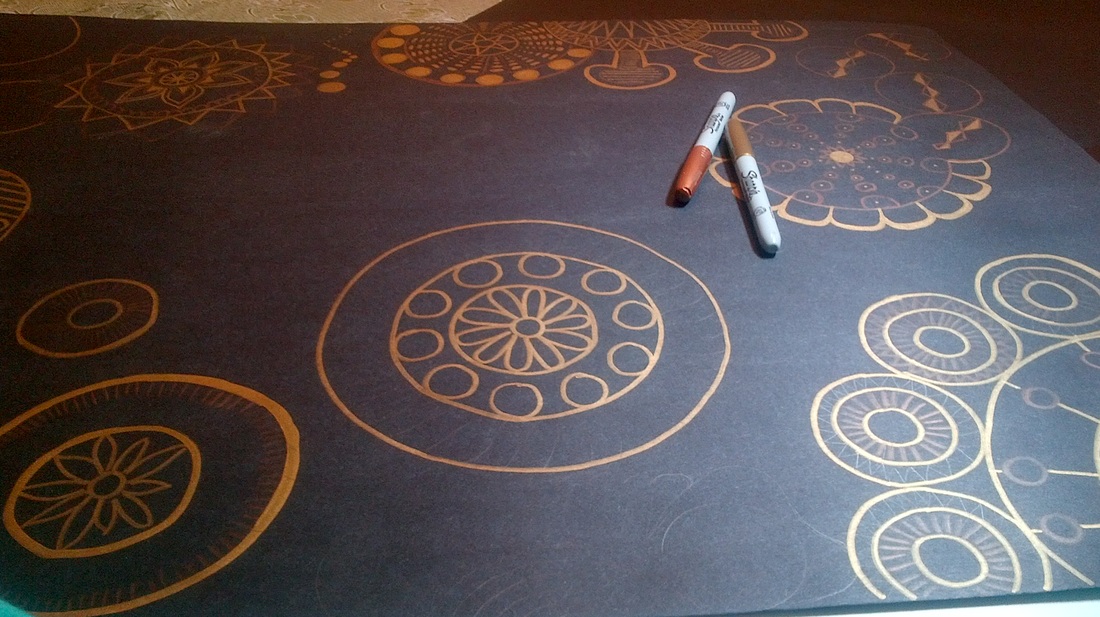
My piece is almost done, I just have to put on the final touches on to my piece, then I will finally be finished
|
|
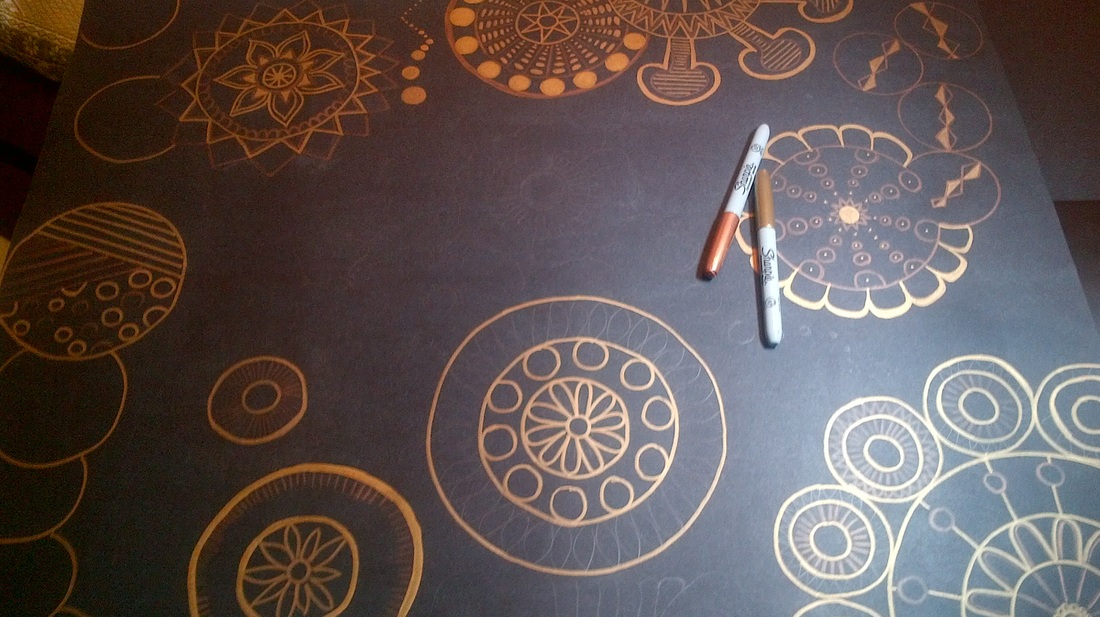
My bronze marker is starting to run out a bit and I am afraid I wont be able to finish this piece.
I also have another shiny marker which I am using in certain places which consist of circles so it would pop out more when light is shown on top.
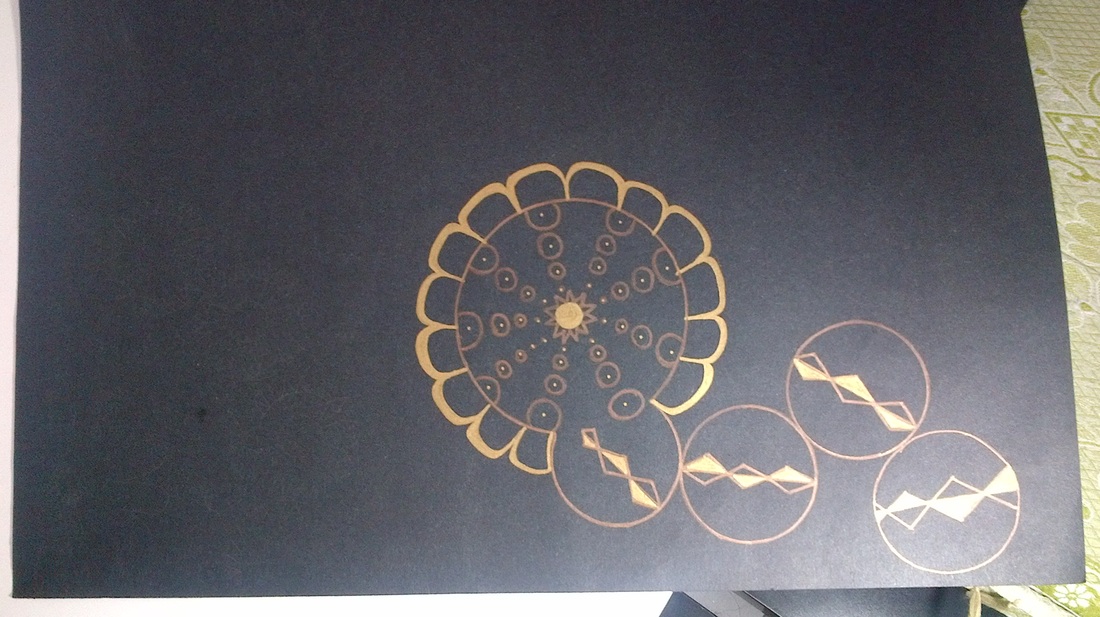
The piece I wanted to do for my next project was just simply design, shapes and patterns and basically I wanted to take things from all around my house, different shapes and sizes and take those and use them as stencils in my body of work, so I began my drawing lightly out many different shapes, patterns and designs. I then started by taking a bronze and metallic marker and started using them where applicable and contrasting the two colors together. Here you can't really see the pencil marks or the designs as they are very light.
ARTWORK # 2 AND 3
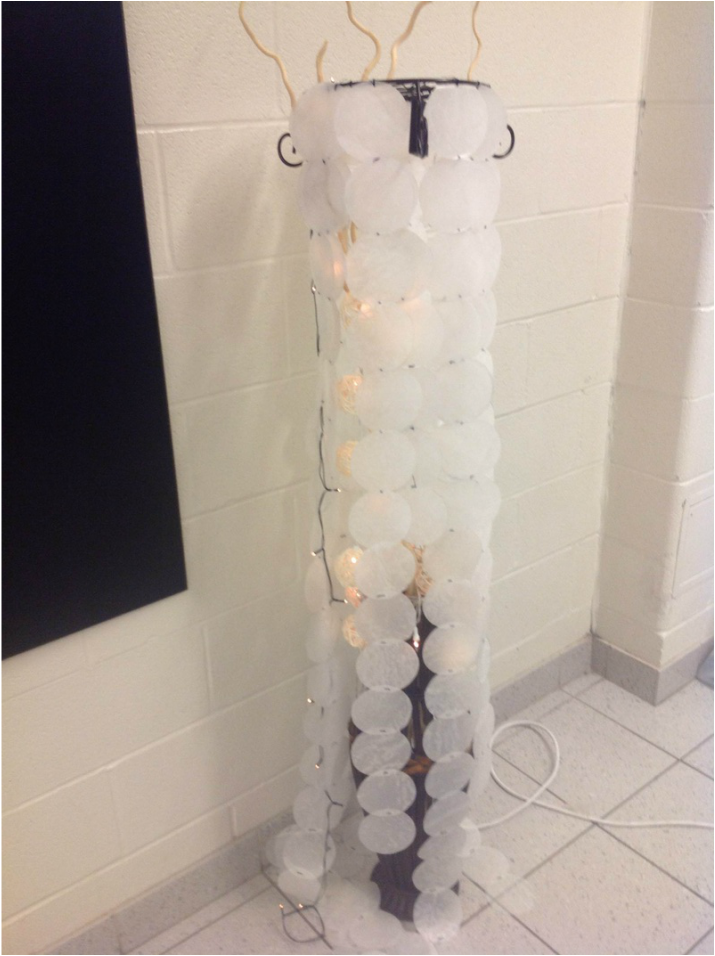
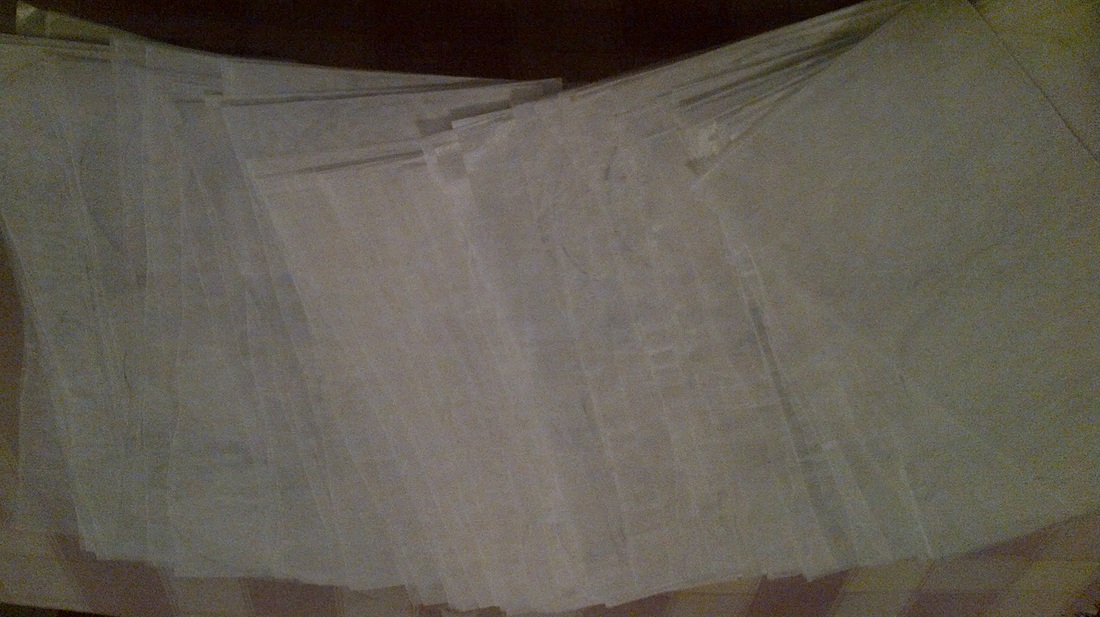
I wish this was hung up it would have looked really nice, also a lot of my wax papers fell off...
ALMOST FINISHED
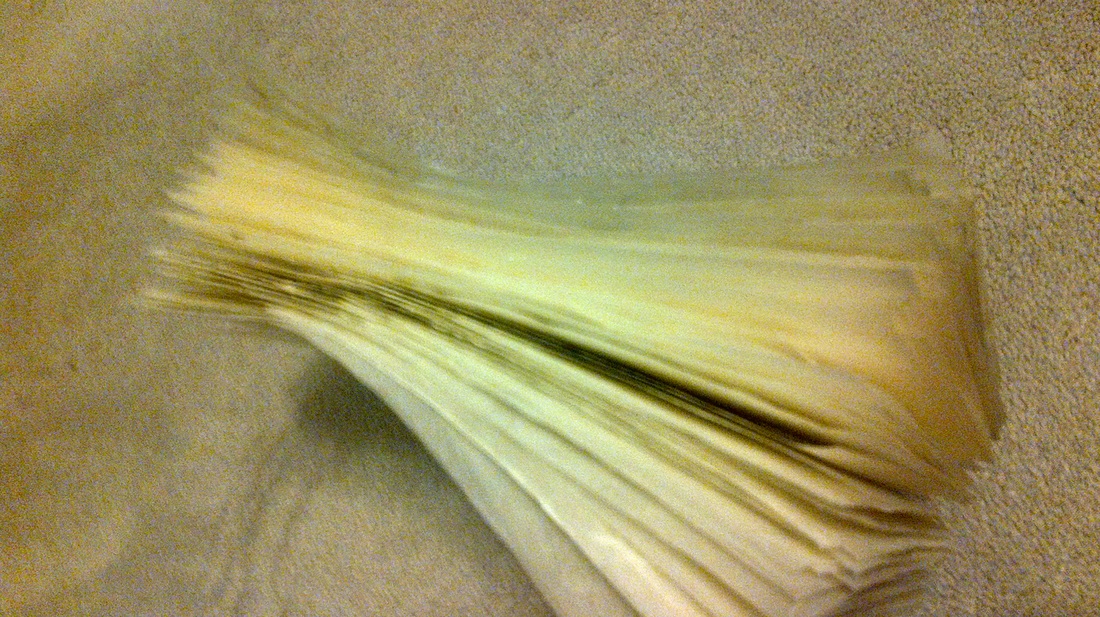
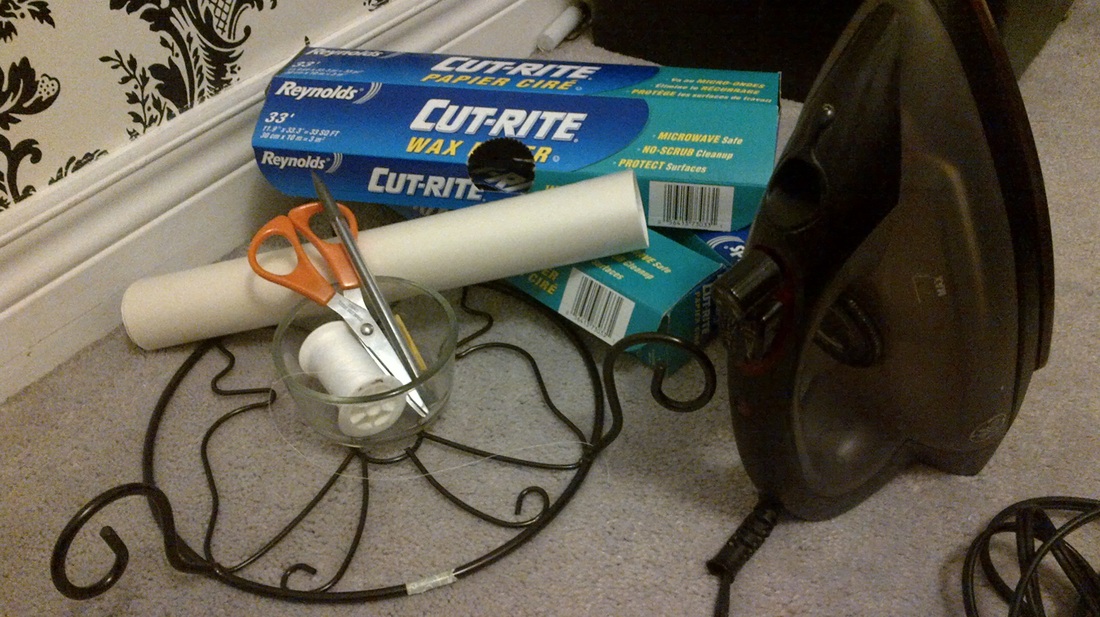
Next I am taking all the sewed pieces together and am wraping them with string onto the base I had bought and letting them hang .
|
|
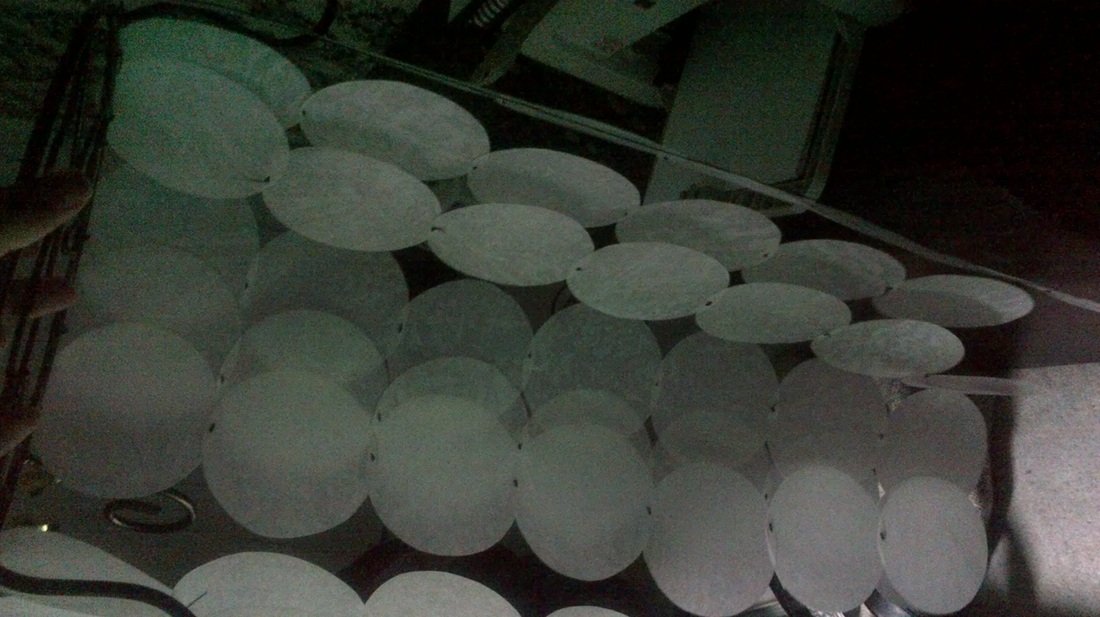
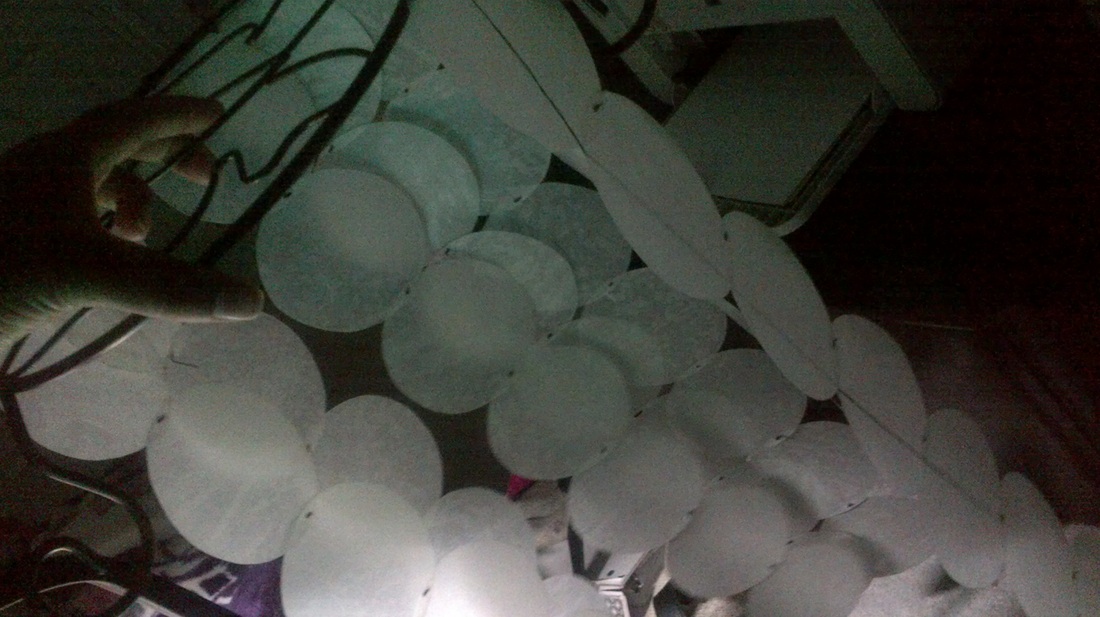
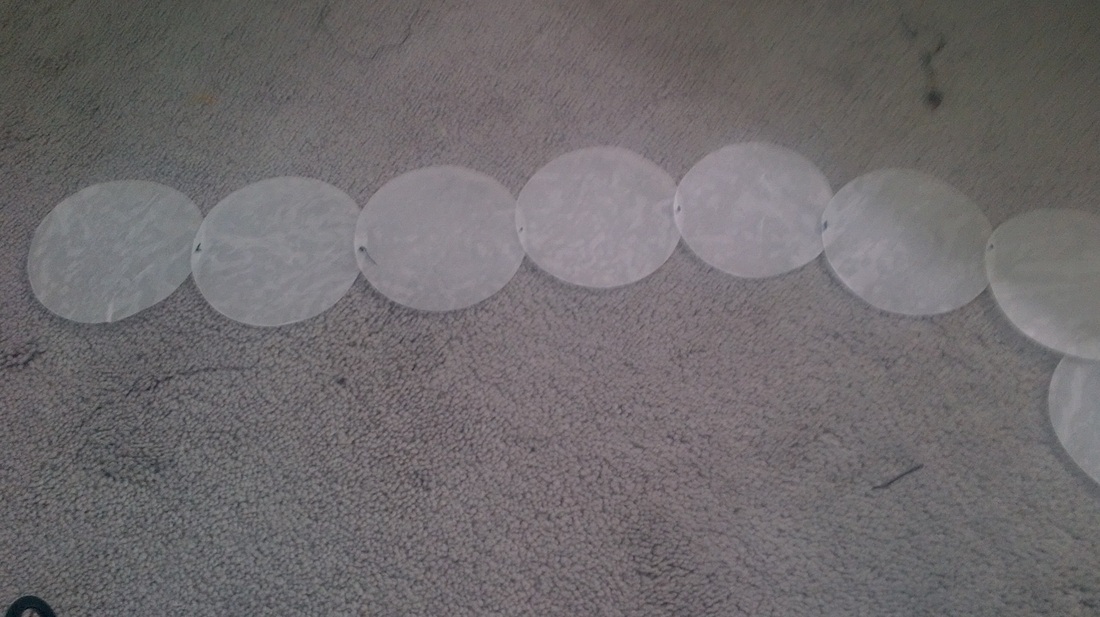
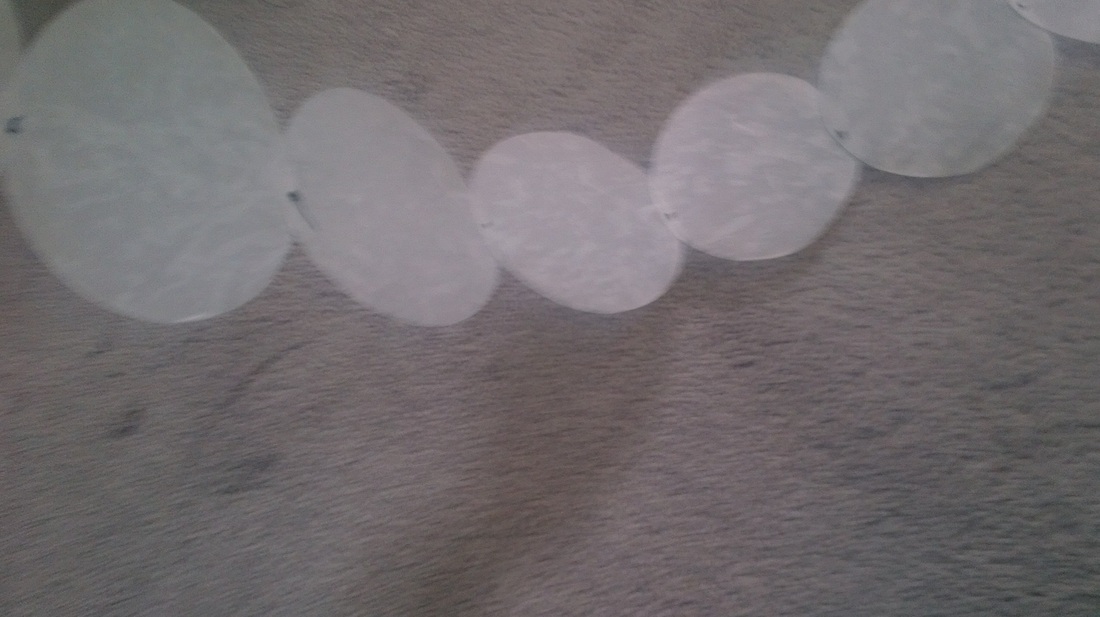
I am now sewing the shells together about 6 and 7 together.
|
|
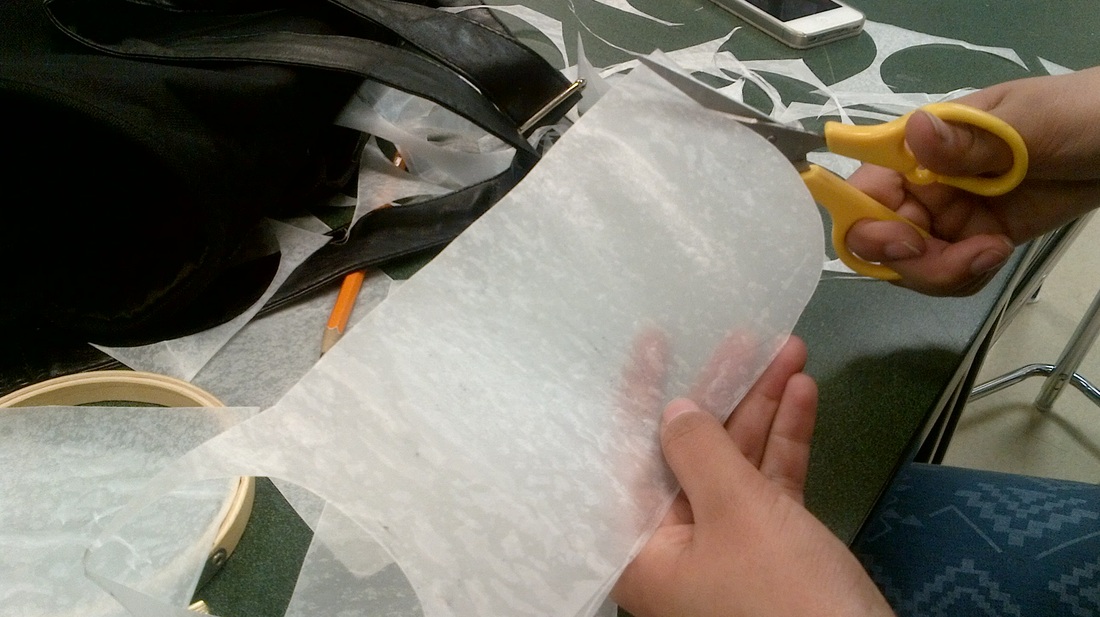
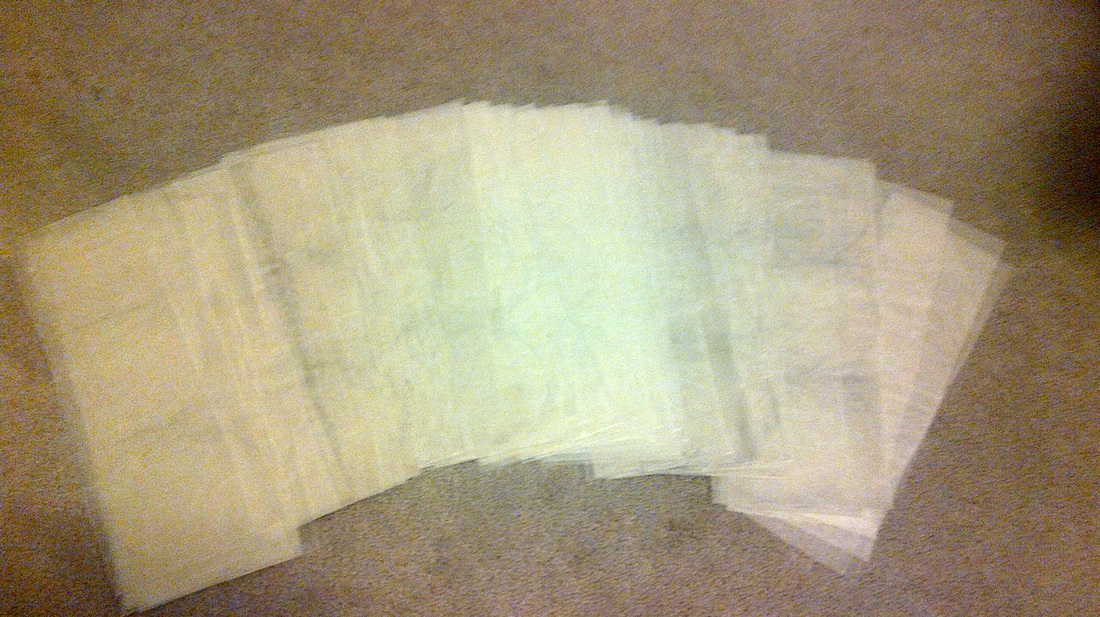
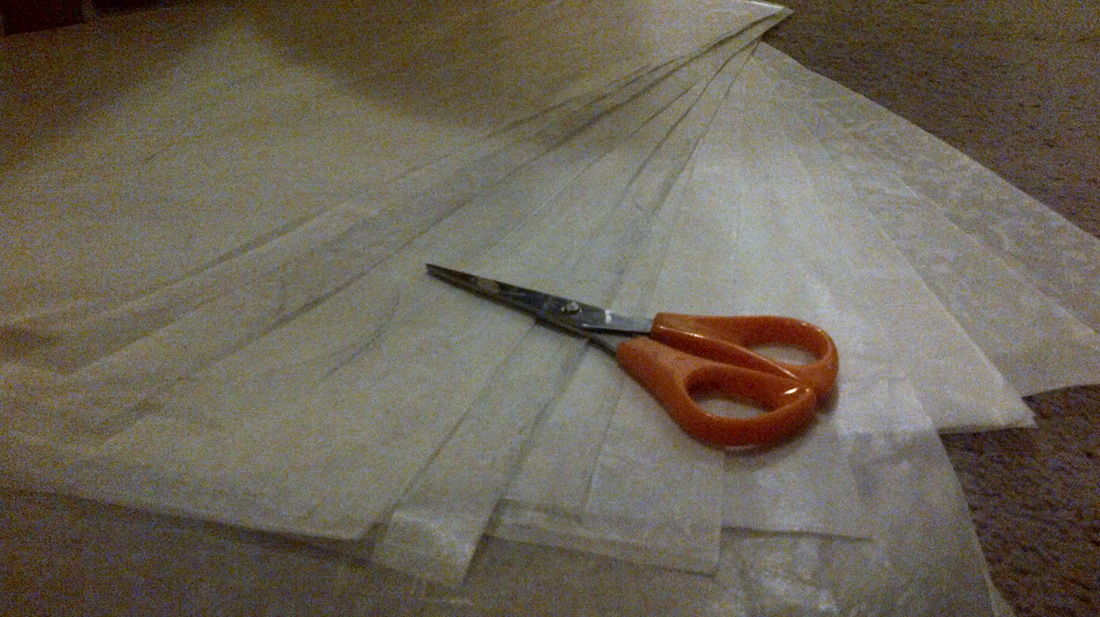
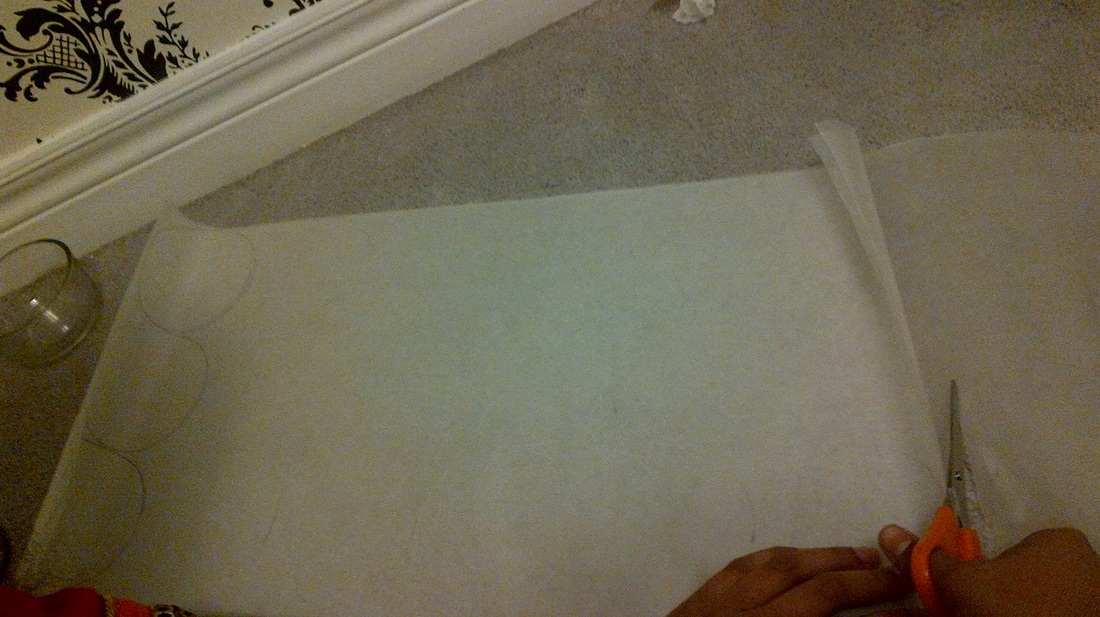
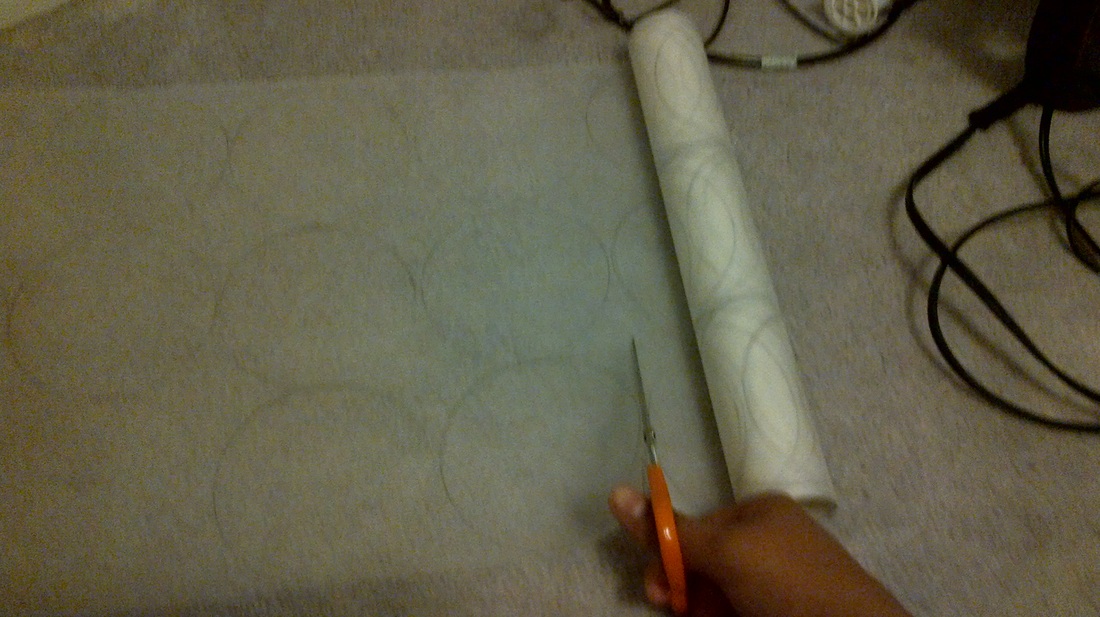
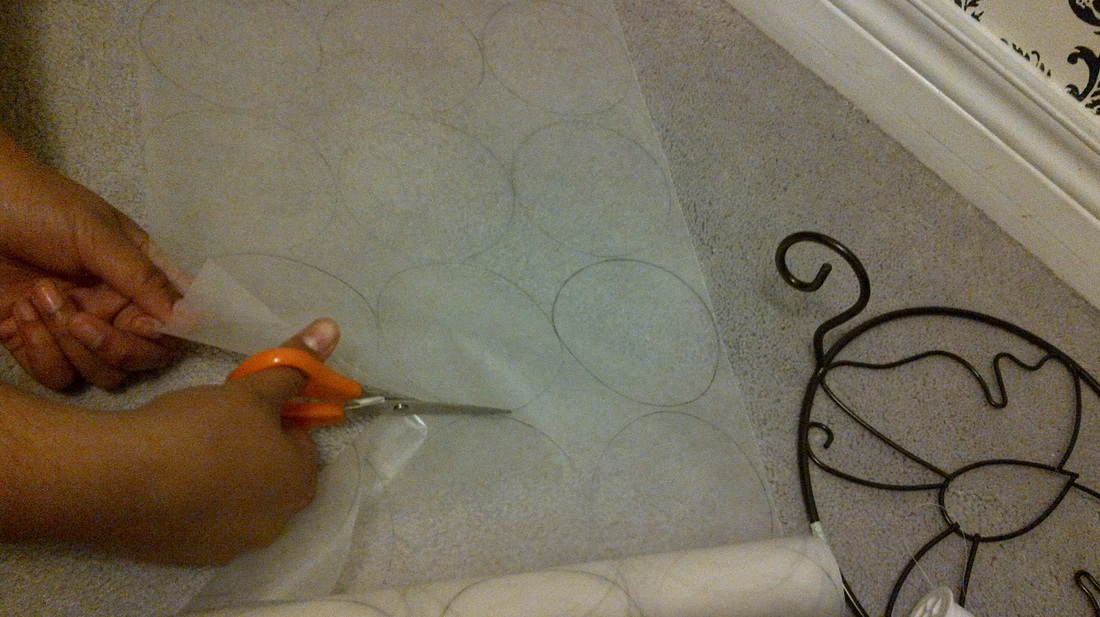
I have started cutting out hundred of these cape shells, this is by far taking the longest in the whole process
|
|
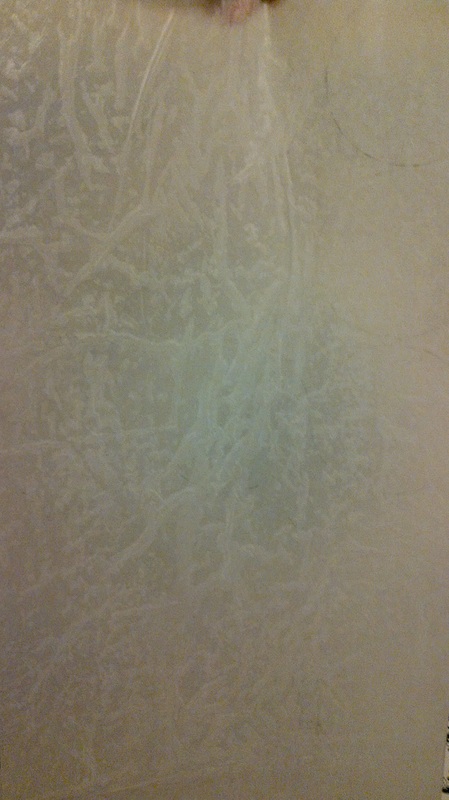
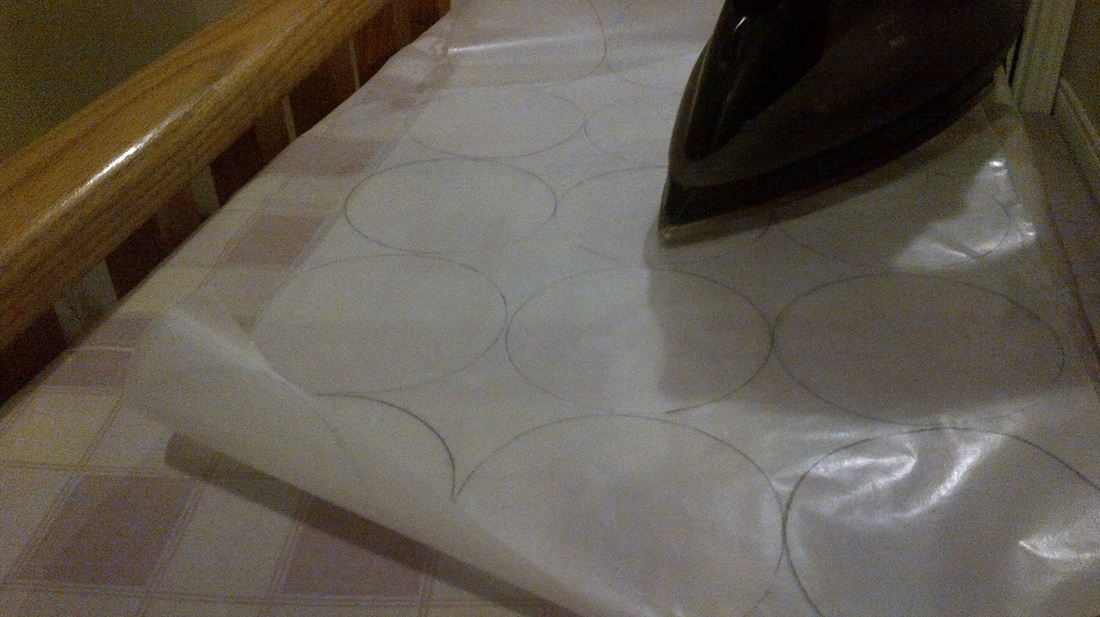
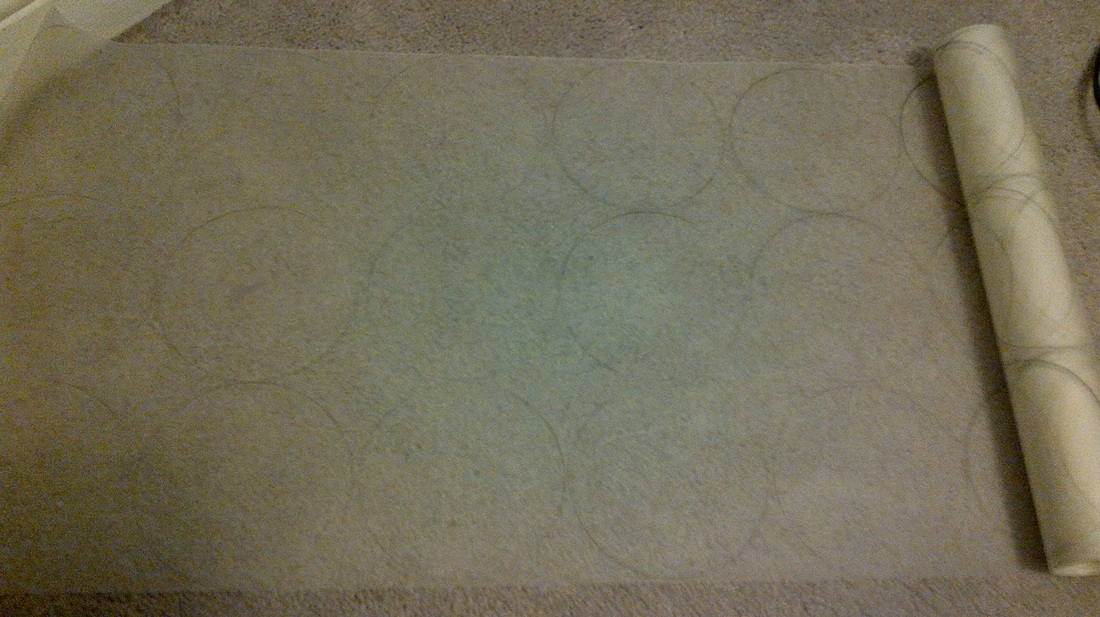
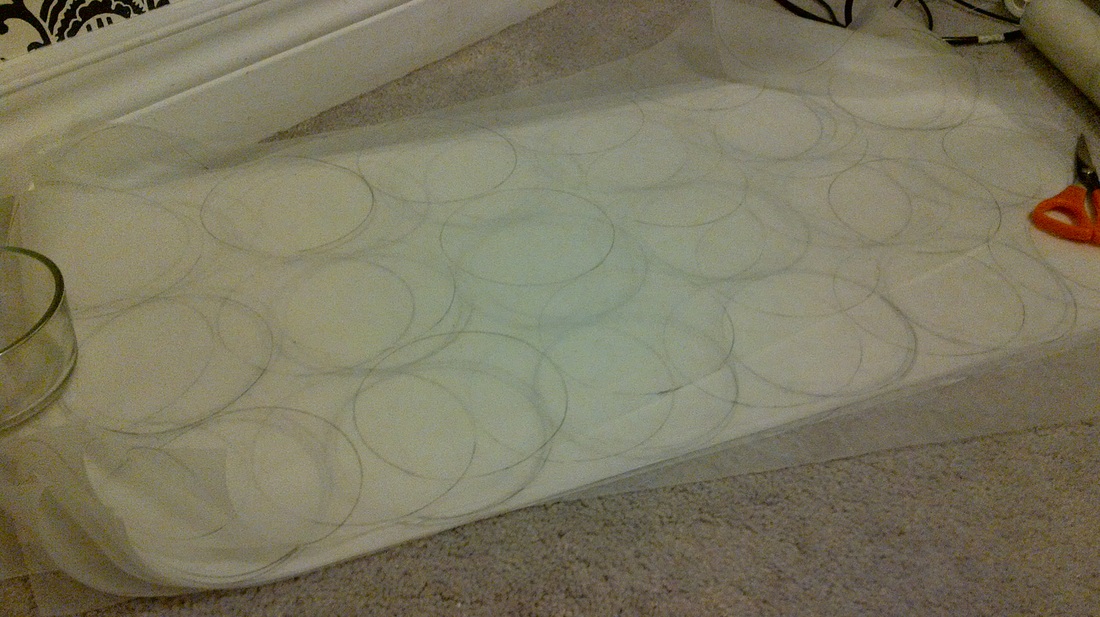
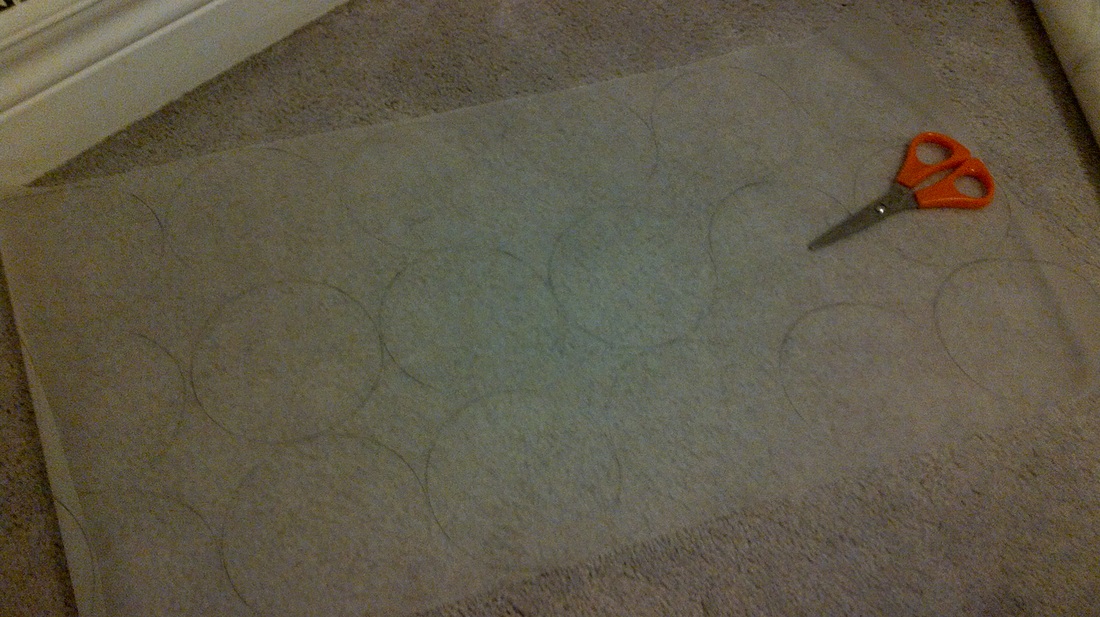
This is really time consuming process, the circle lines have faded and are really hard to see, i might have to retrace some of the circles.
|
|
|
|
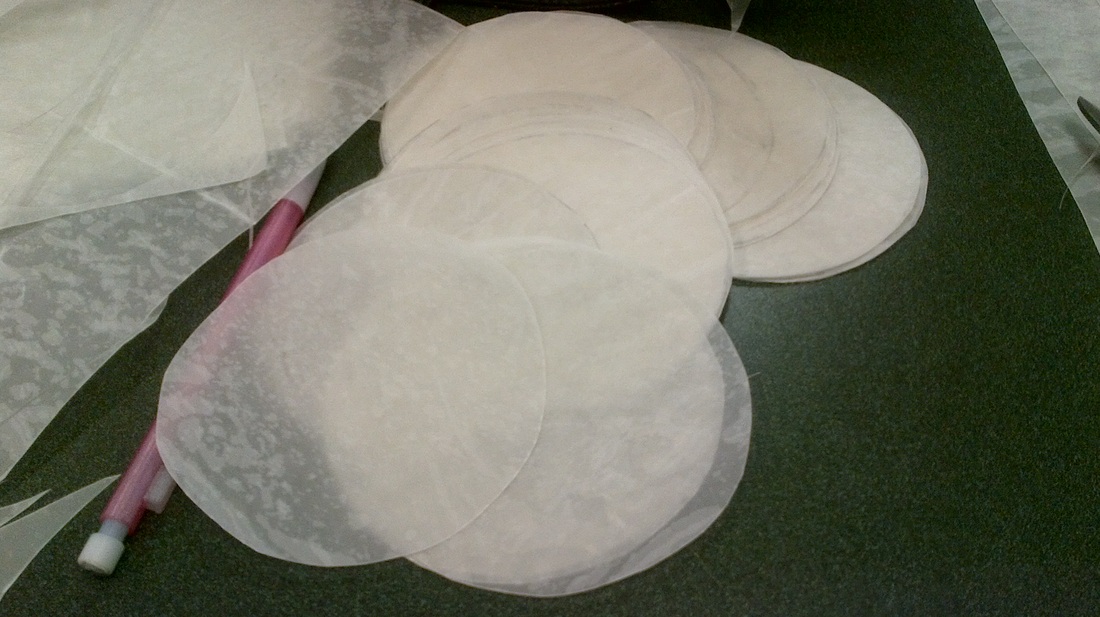
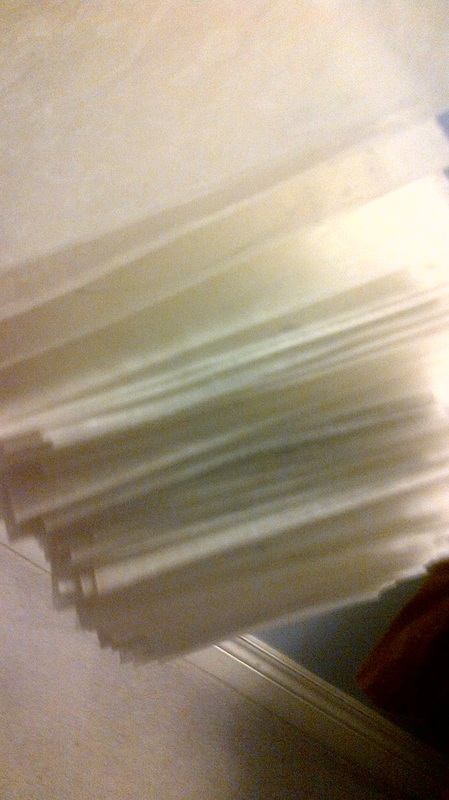
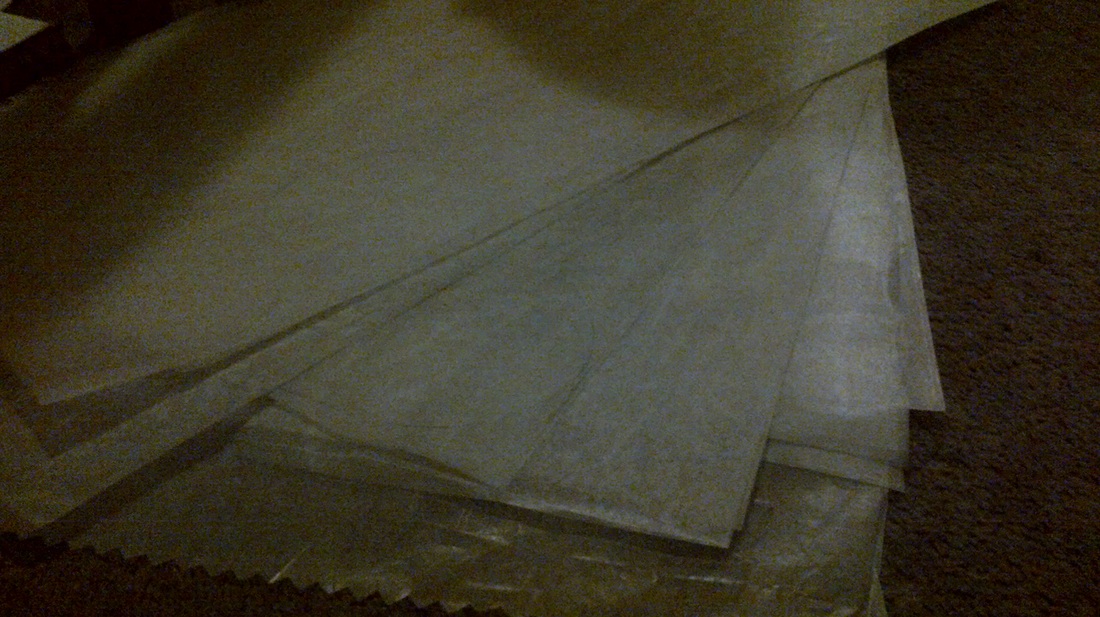
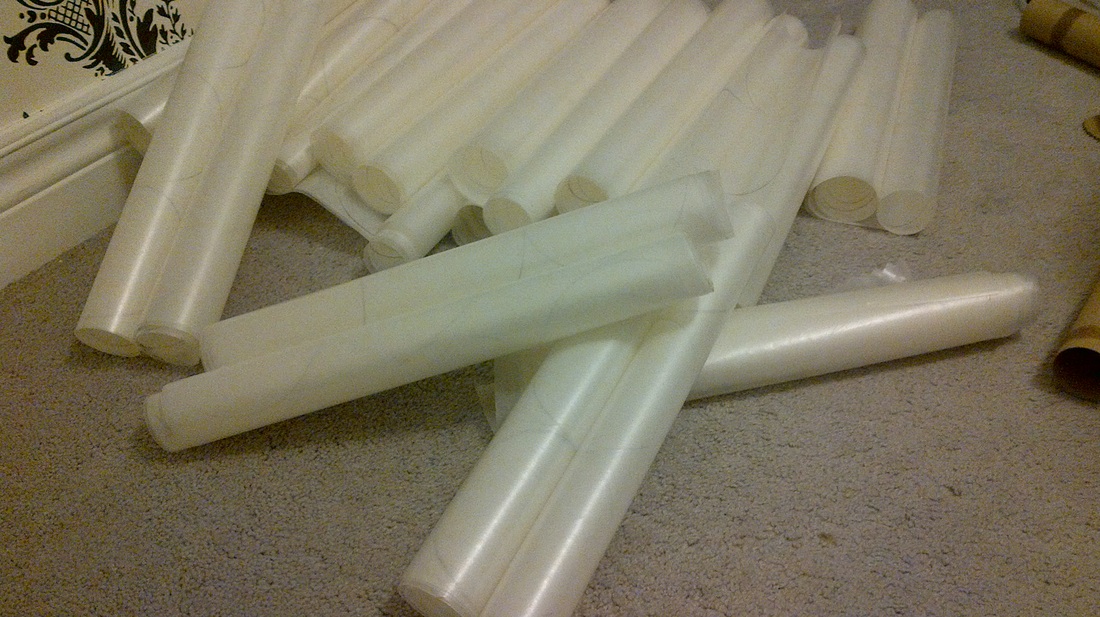
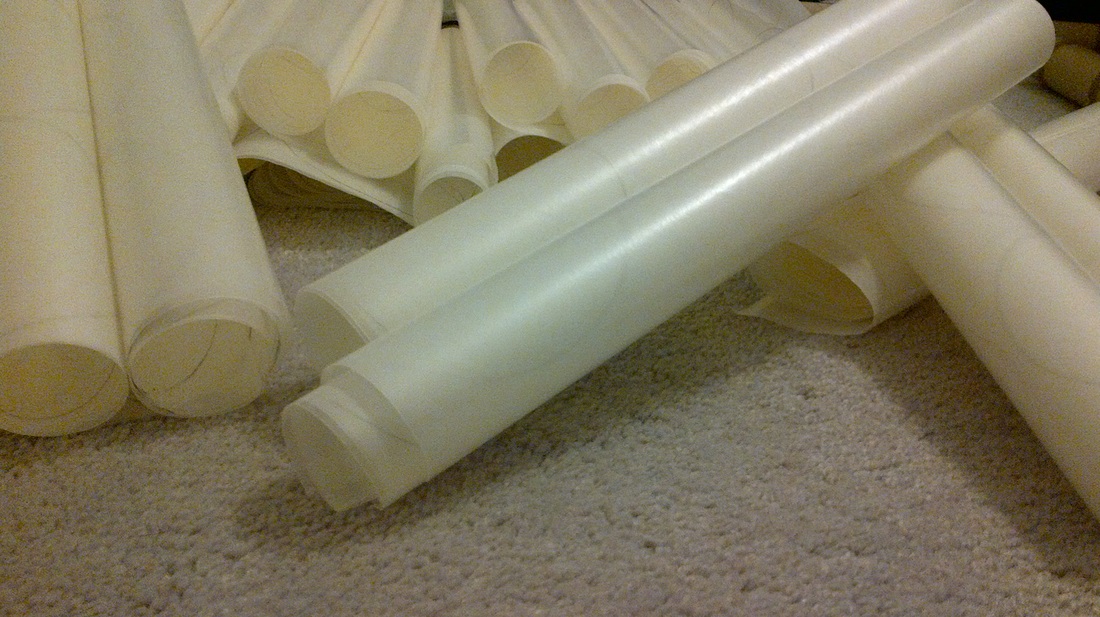
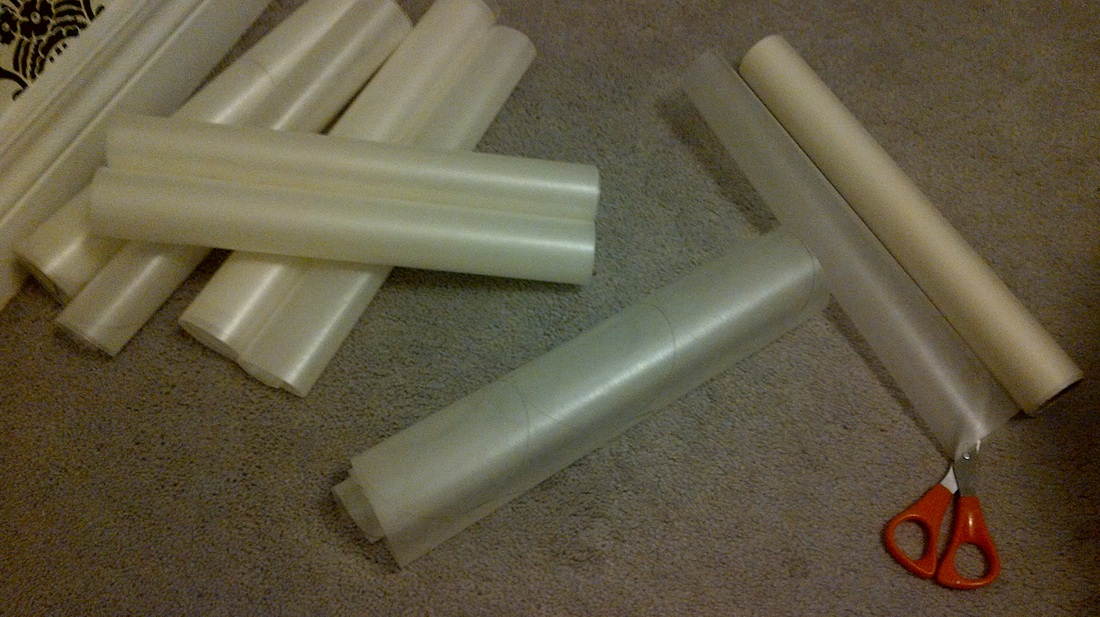
I have now started cutting the ironed wax paper into threes so I can then cut out the circles.

|
|
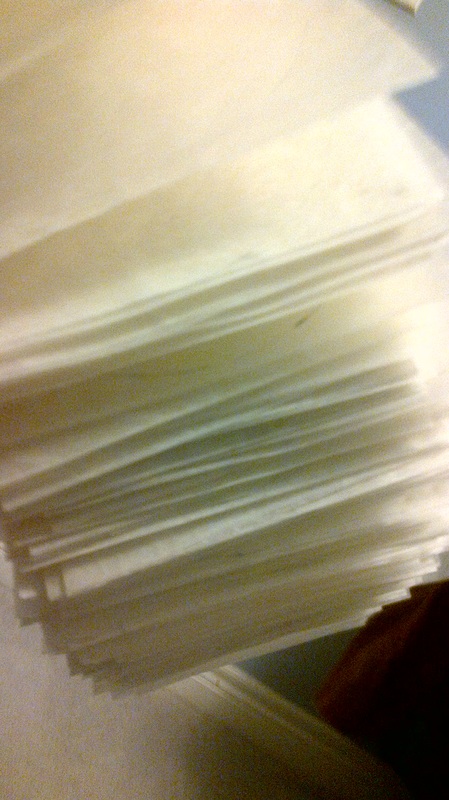
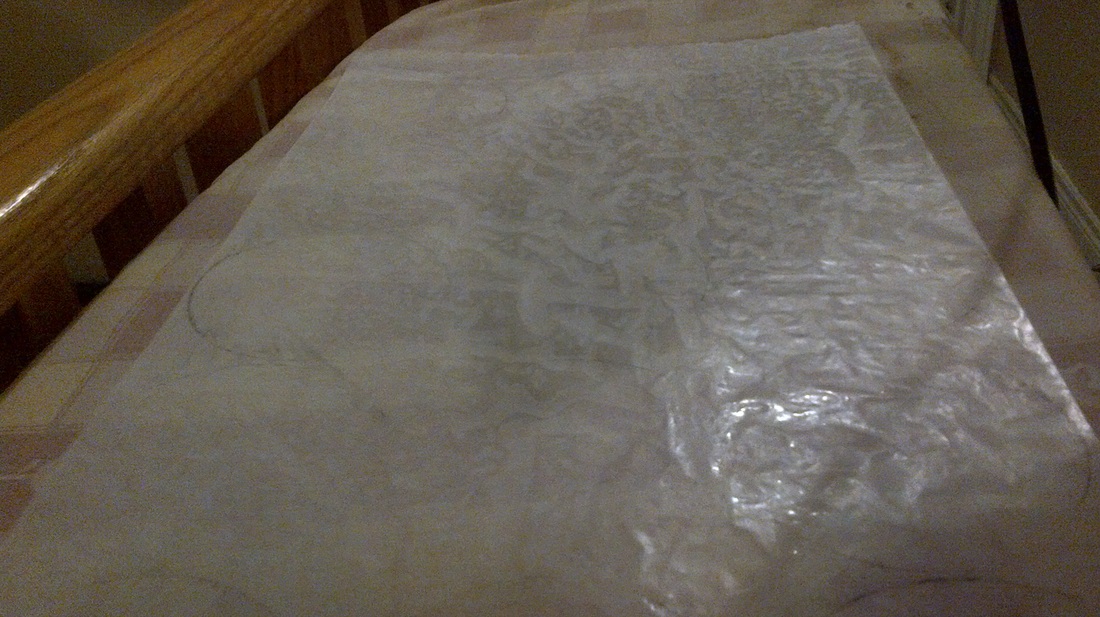
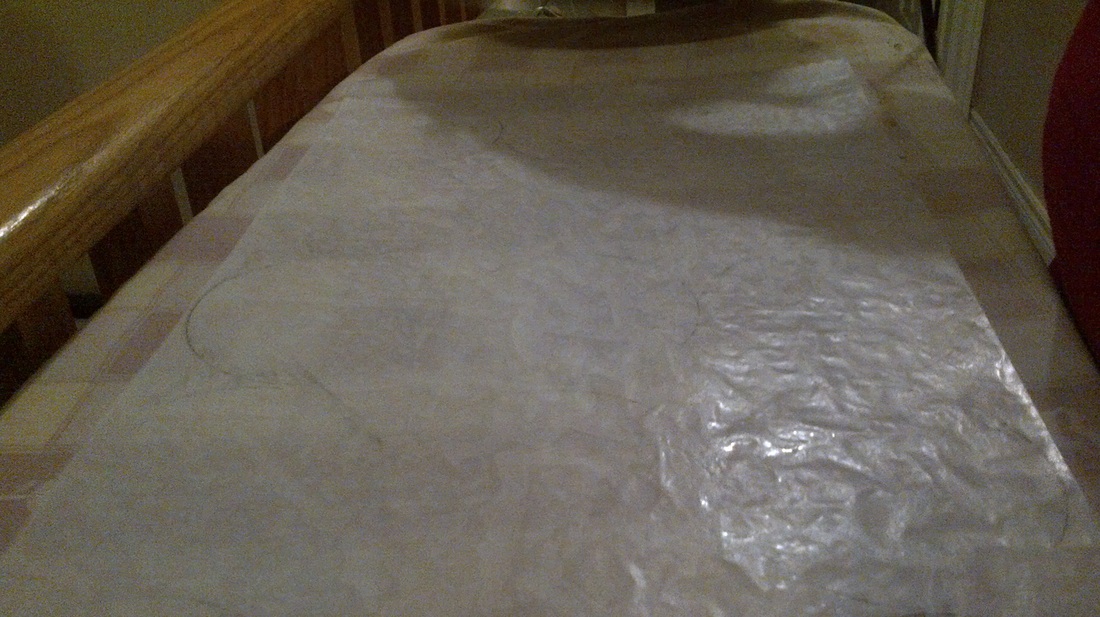
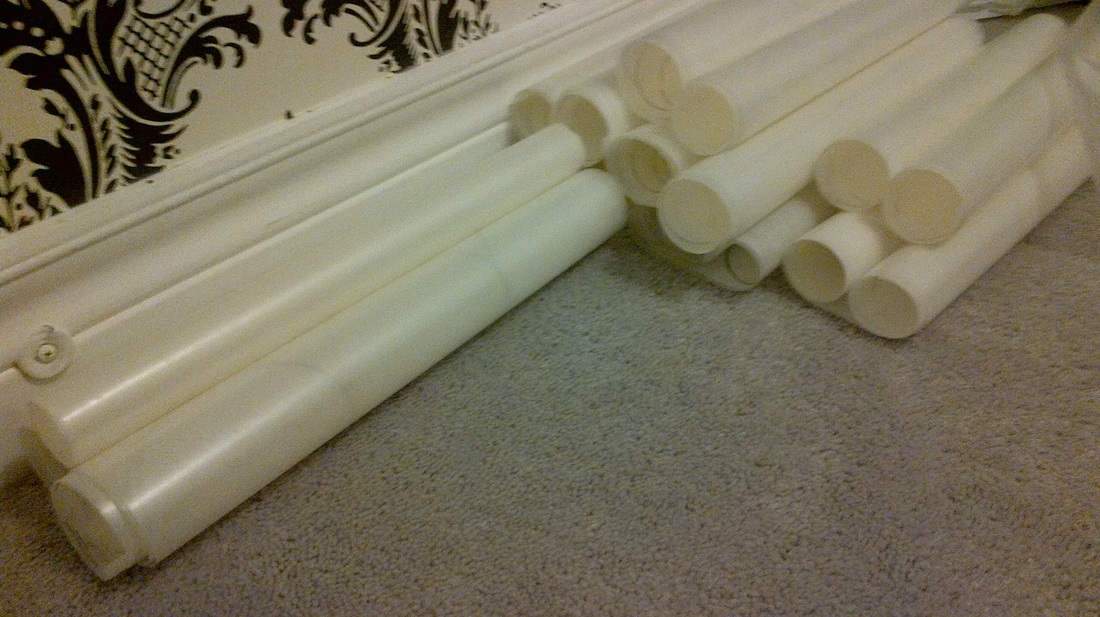
Here is the wax paper ironed with 3 sheets of wax paper, they are hard like shells and they have a cool texture, there also seems to be bubbles in between the paper which is good because when this item is installed then the lights that will go in will reflect and go through those gaps.
|

|
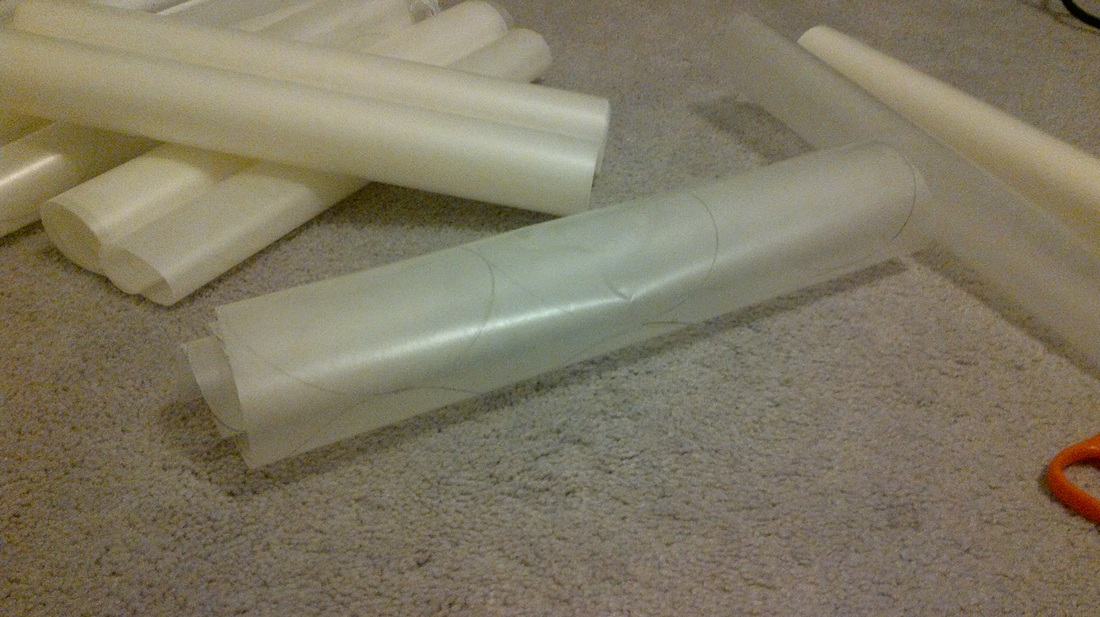
So you can start to see that the paper is starting to harden and they are coming about, the only thing I am a little worried about right now is the pencil marks are starting to disappear and it is hard to see, so I am going to have some trouble for when I start cutting.
|

SO here basically what I am doing is taking 3 sheets of wax paper and running an iron through then which melts the wax together and they harden and are not that flimsy and they have this appearance of shells.
Apparently they look like real cape shells that are used for real chandeliers, but really like the product so far. Also this is taking a lot of time as well, since i have to align the wax paper together and iron on top for a good two minutes. |

|
|
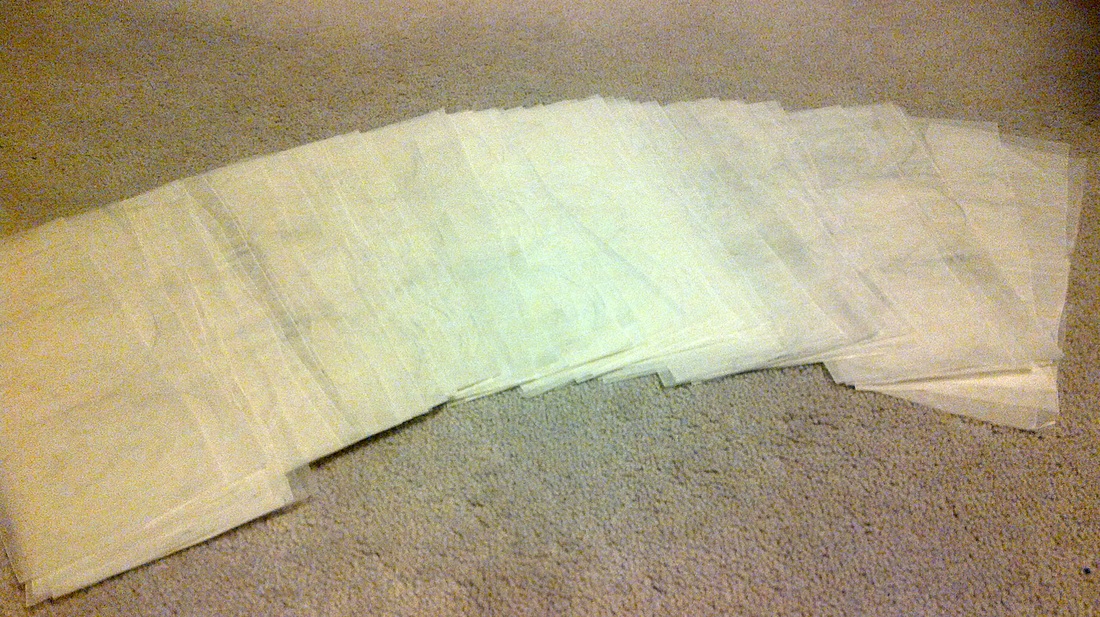
So i am still cutting tons ans tons of traced wax paper. I will soon have to iron then together.

|


|
This was a very time consuming process as it took a really long time just to trace out the circles, I cut the circles into sections so later when I iron then together it would be easier.
|

|
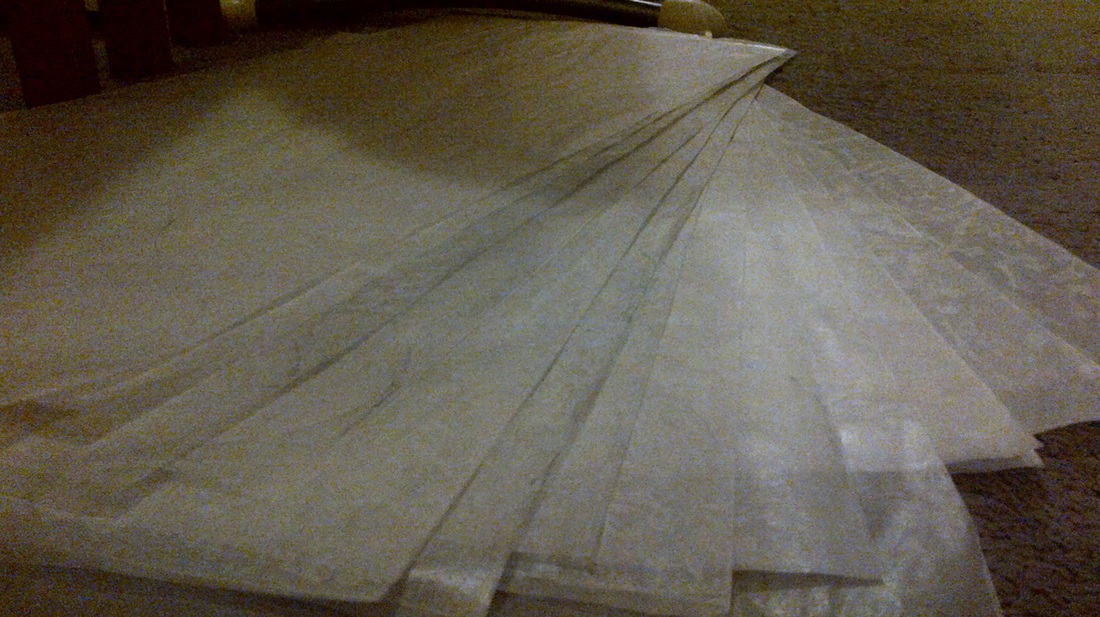
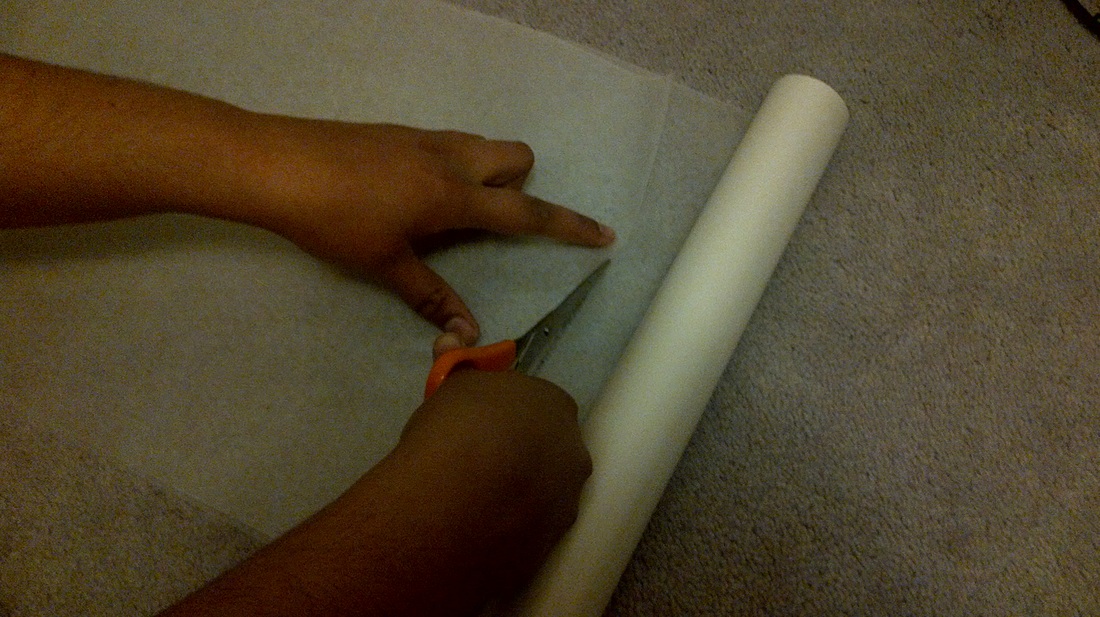
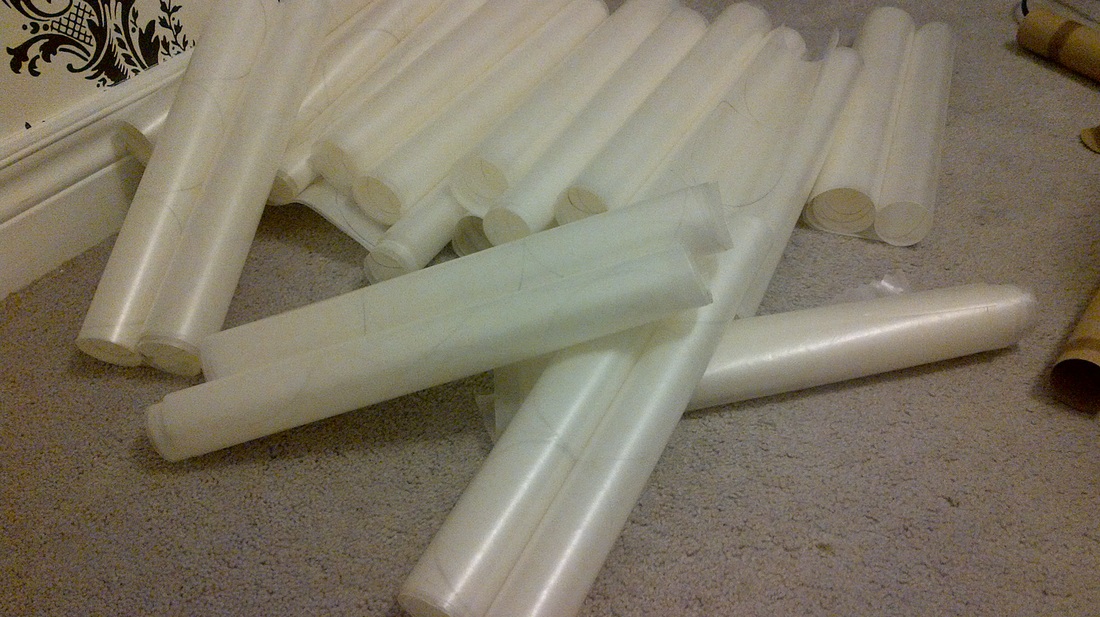
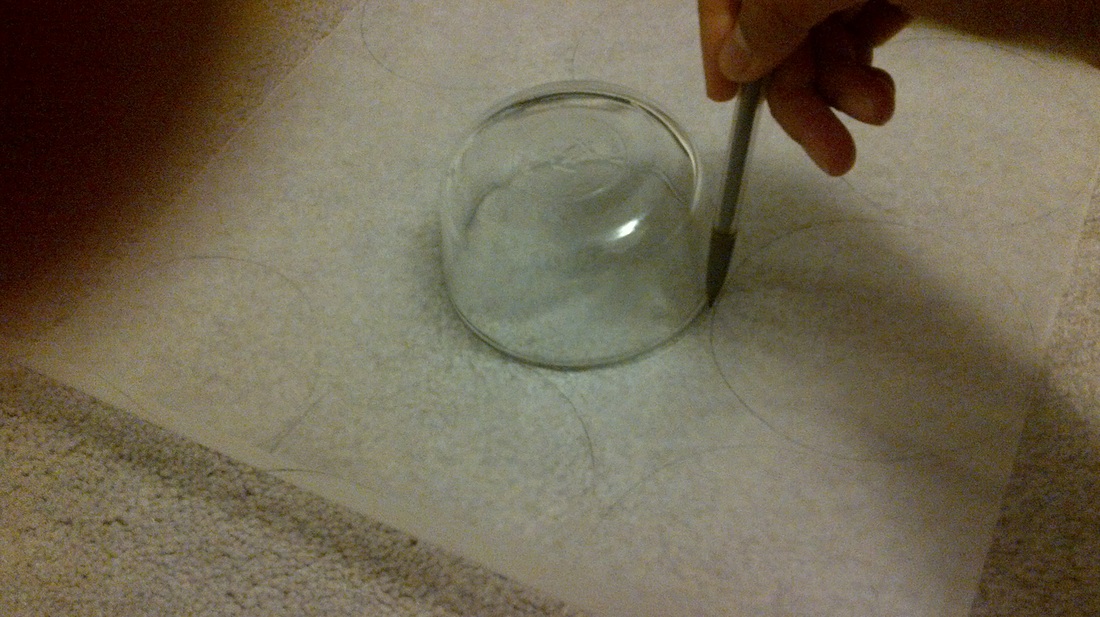
I began by drawing out hundreds of circles by tracing from a bowl, and did this all throughout the boxes of wax paper.
After I was done drawing circles 3x6 i would then cut out that part of the wax paper and set it aside
After I was done drawing circles 3x6 i would then cut out that part of the wax paper and set it aside
I was looking online and found these really cool chandeliers that were made from things around the house and they actually looked like the real deal. I then decided I would start out to make the chandeliers as my next project because it consisted of shapes which is apart of my theme. So I began by buying a couple of boxes of wax paper, and got started on drawing circles on the wax sheets and did this all throughout for all three boxes that i bought.
|
|
|
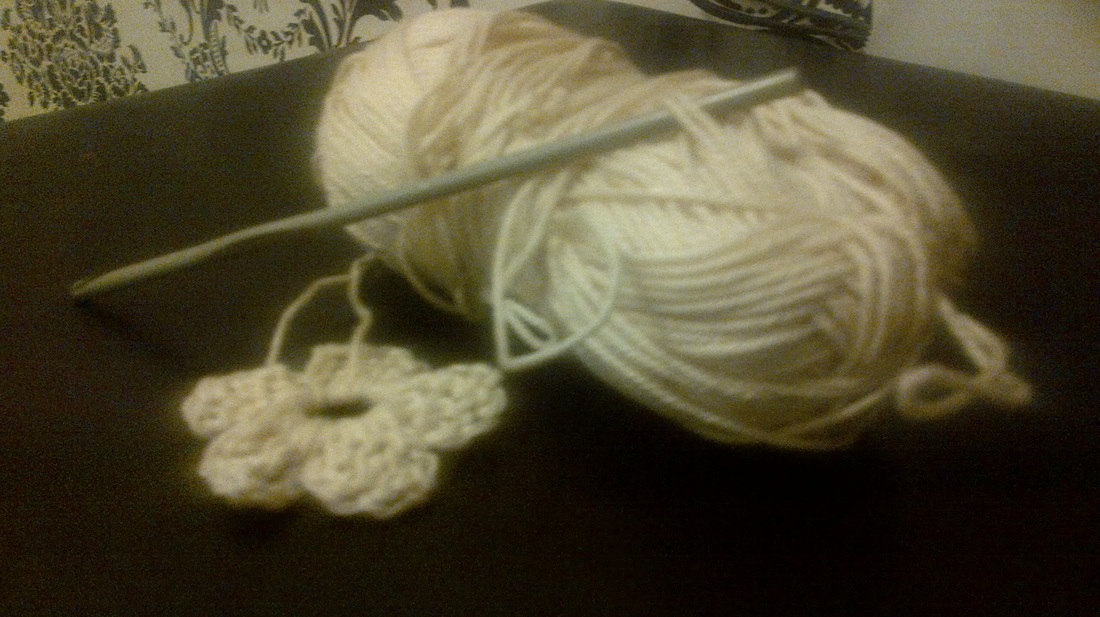
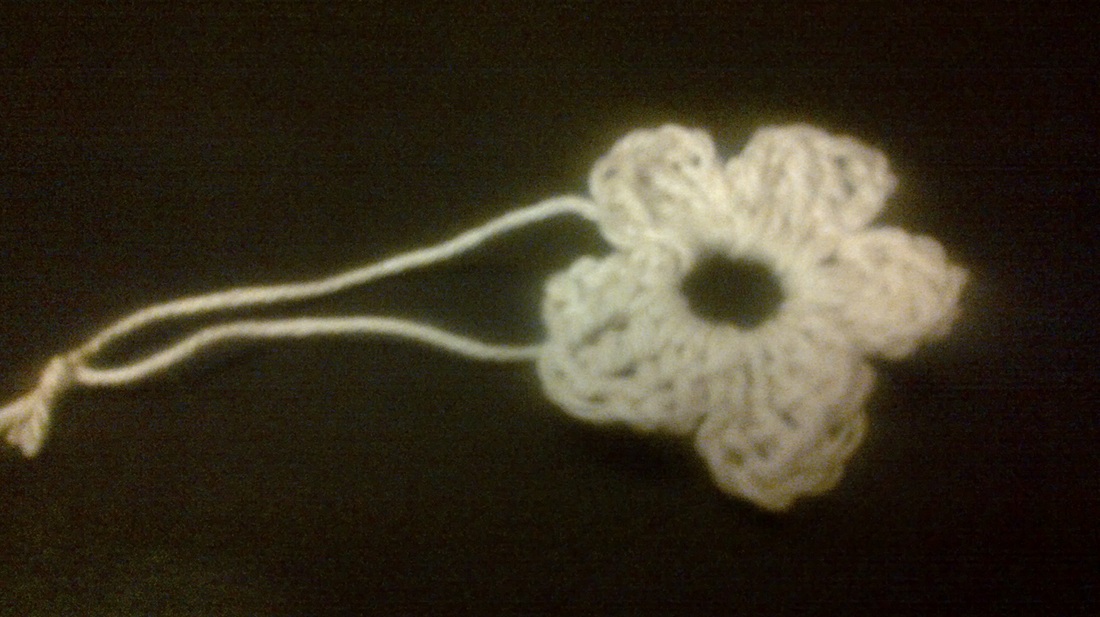
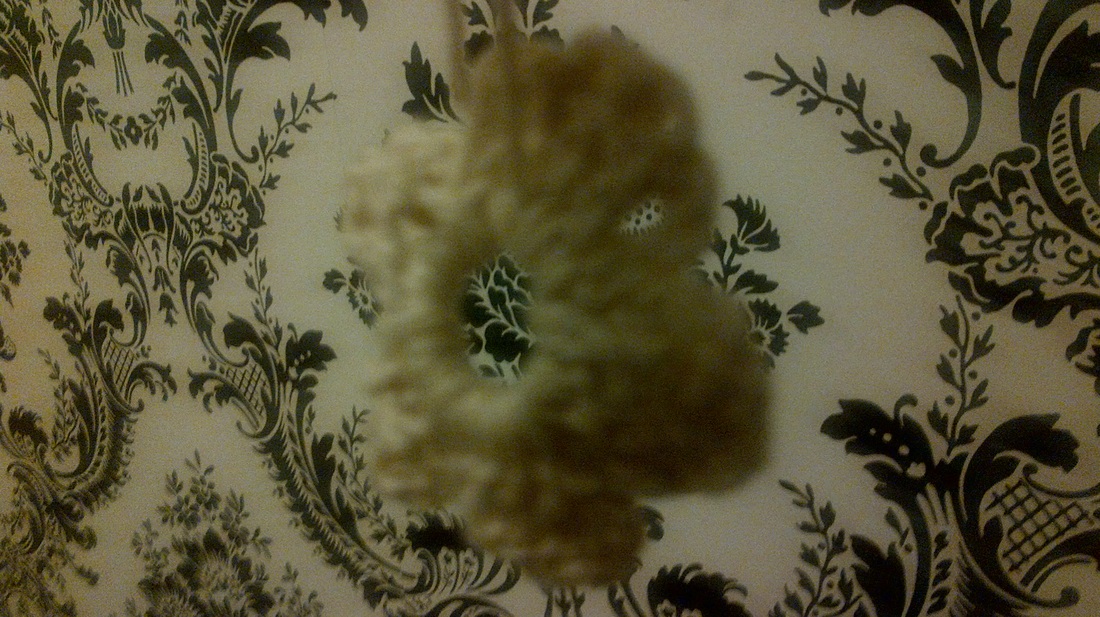
Ms. Showalter suggested i should, try crochet, and go on to pursue that with my next project, so i tried it out, and i really liked it...though it took me some time, i am understanding how to crochet with help from Ms. Showalter and YouTube, i made a tiny flower, now the question is on what i shall do for my actual project itself??
|
|
|
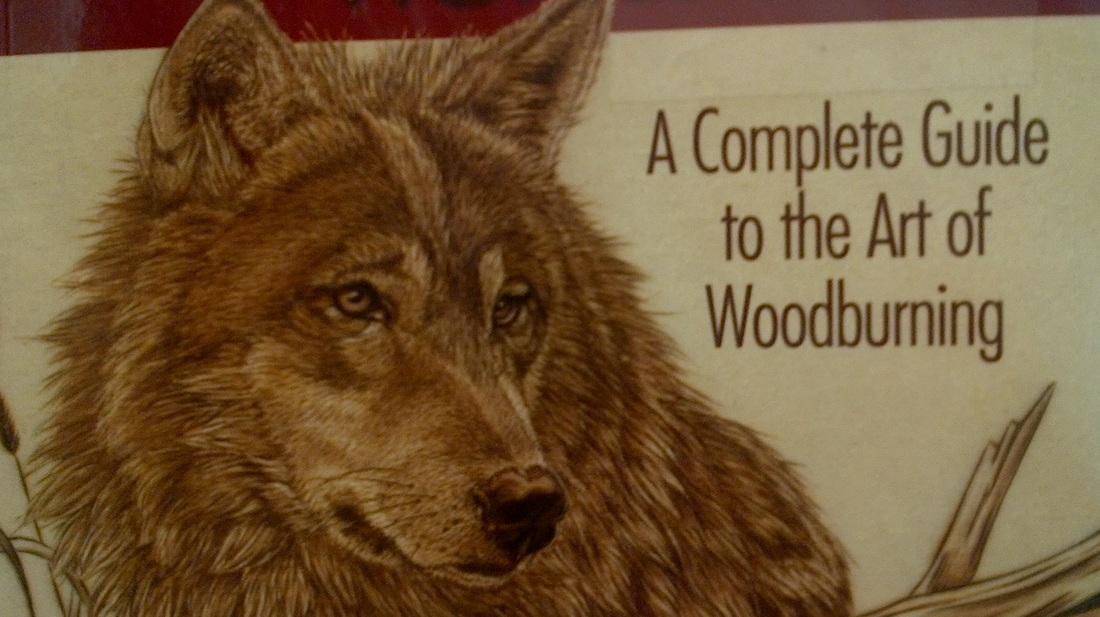
I am currently trying to decide on what to do for my next project, i am really confused...Ms. Showalter has this really cool book which shows you on things on everything to do with wood burning, and i was thinking maybe i can carve designs into the wood and that can give you a really cool effect and it would be different, but i found out that you need the machine for it and it cost up to $60 to $70 and it wouldn't have been too bad, i could have gone through with it but i would have only used it once, and it would have been a waste.
Artwork # 1
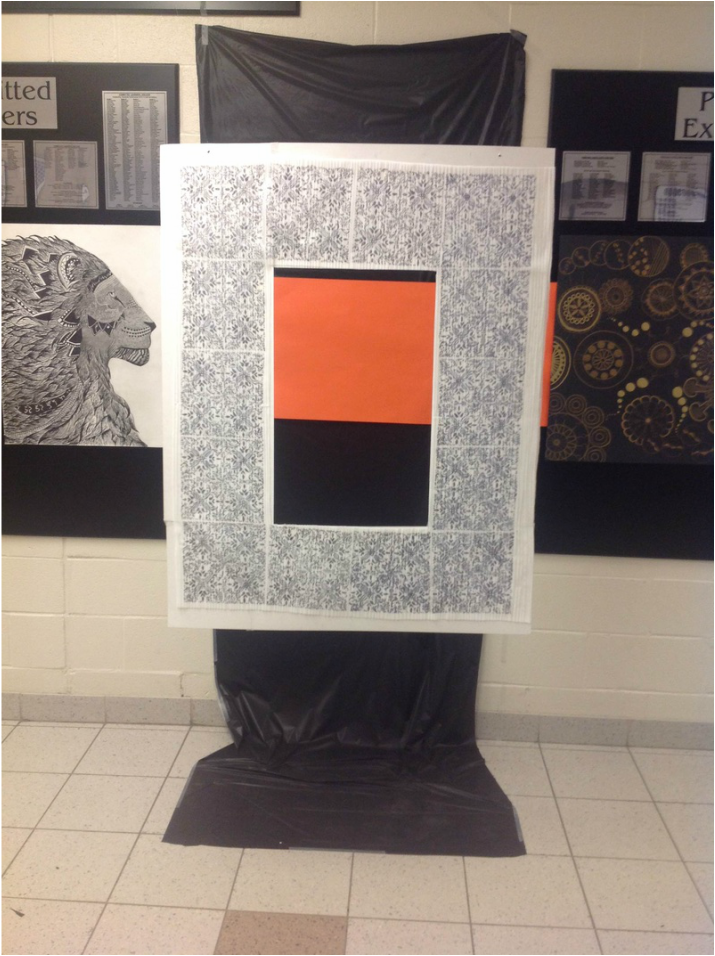
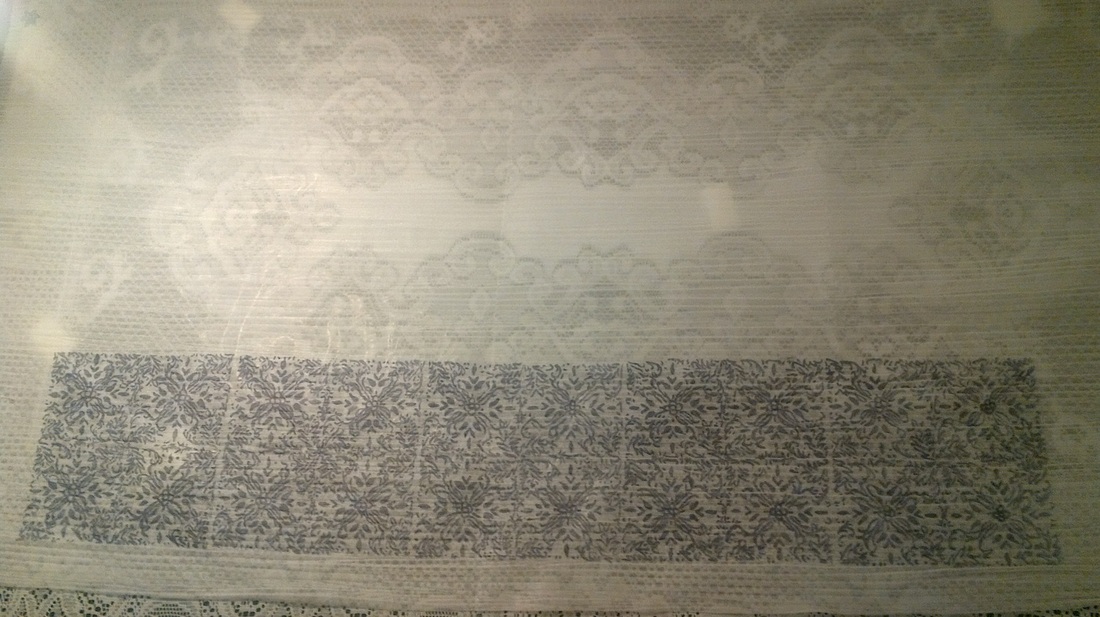
So this is the final product, i ended up cutting out the middle to make it into a frame, and so people can go and take pictures. I also added white cardboard in the back because it allows the designs to pop out.
YAAAAAAH! I am finally complete, spent the whole day working on it and i have finally finished and am sort of pleased with the final product though it is not completly finished yet, i also showed it to Ms. Showalter, don't exactly know from her talking of weather she liked it or not, but discussed with her about the middle, and so she suggested about how i can try out the color on a sample and see how that turns out or i can just leave it till the end and see what i make of the other pieces and based on that go from there..so i am going to leave it till the end then see what i want to do then because i am a bit confused as what to do.
|
|
|
|
|
|
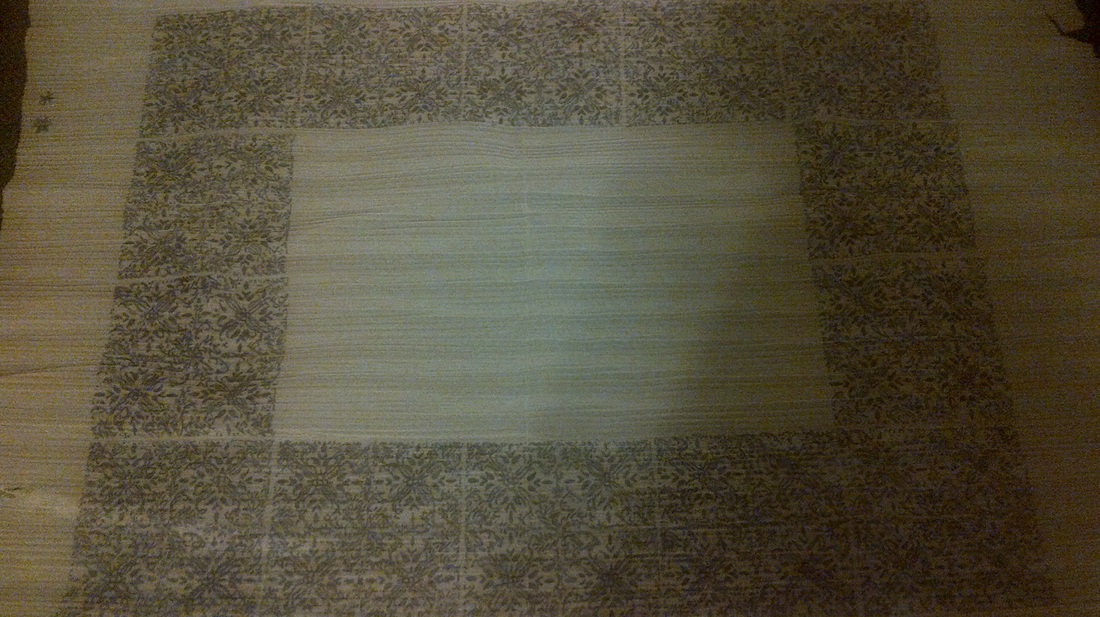
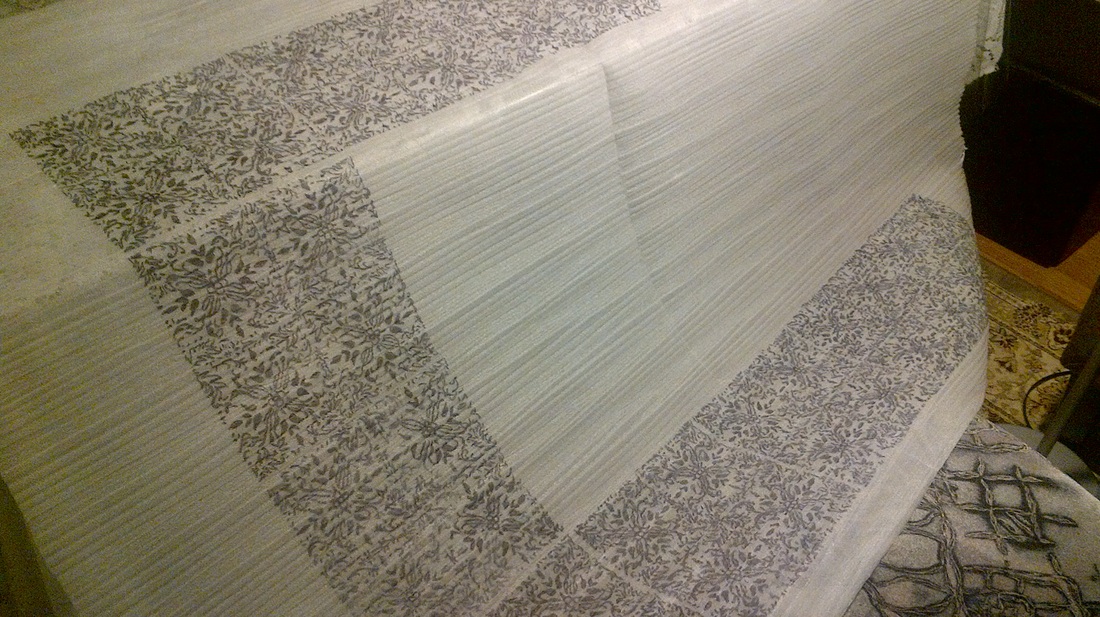
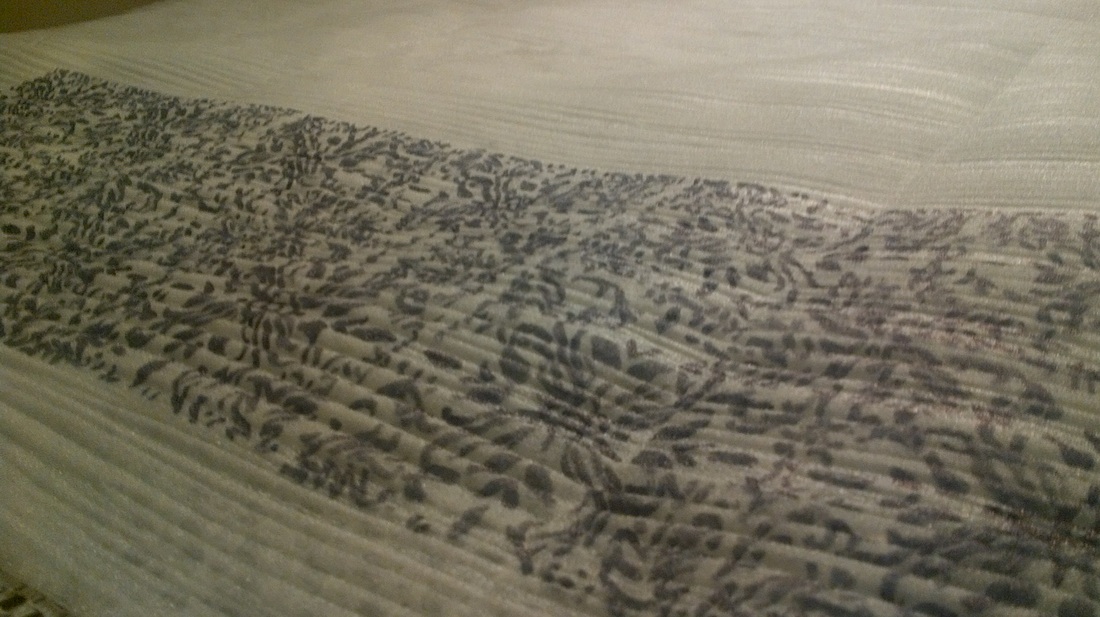
Here is what i have done so far, i started using a new sharpie marker and there is a big improvement and a big difference, i am starting to wish i had started off with a pointy tip to begin with, i think i might need to go over the other designs with the new marker, so i will see how it goes and go from there. This took me another couple of sleepless nights but i am almost finished just need to finish the last side and i will be complete..still haven't decided where i want to go with for the middle. I am sort of leaning on doing a my next piece where it can be place within the border...or maybe adding color...who knows i will worry about that later!
I decided i wanted to sew over the designs so i can get a darker visual, so i decided to test it out and see how it goes, but it literally took me 15 to 20 min just to sew that tiny piece..because the paper is so thin and delicate it was ripping and it was too much of a hassle so i decided to dismiss that idea and continue on with a new sharpie marker with the rest of the designs.
One side done..three more to go
|
You can tell it is very light here.
|
|
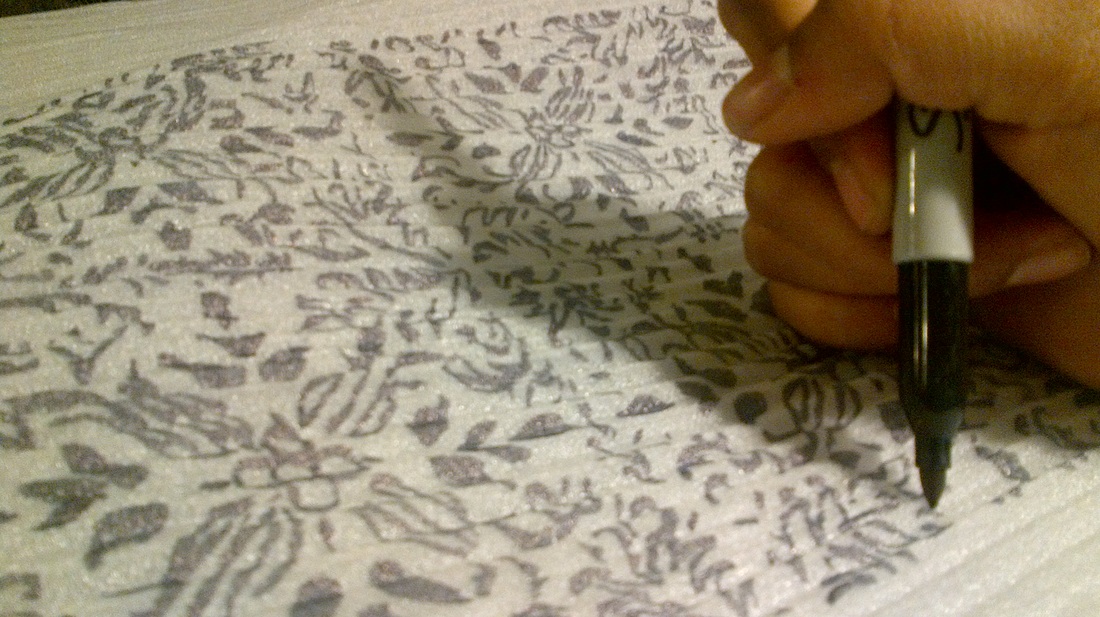
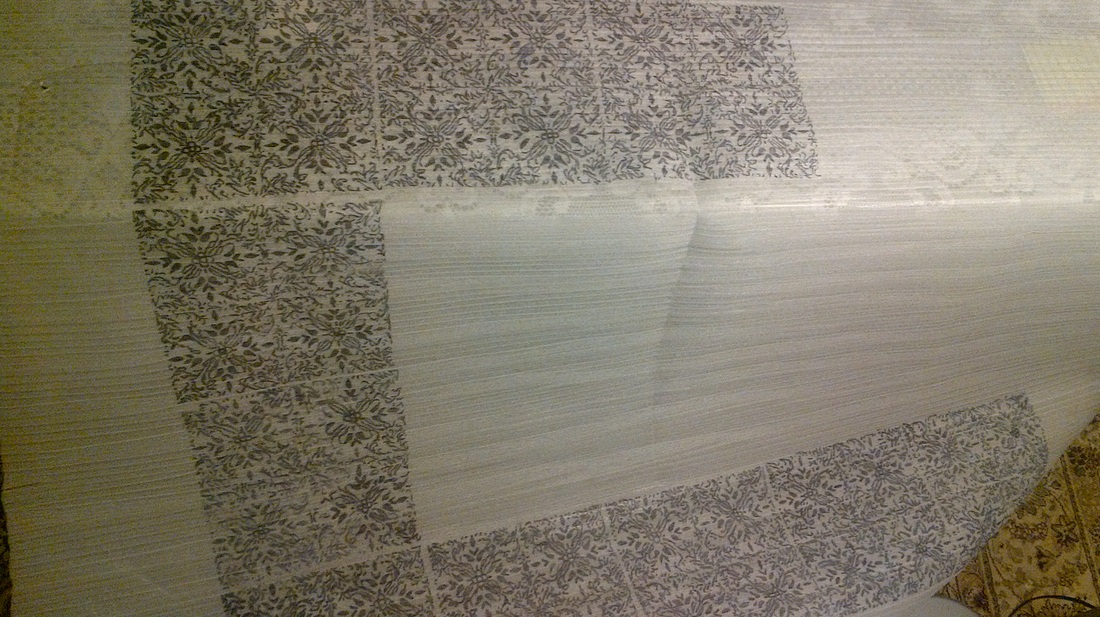
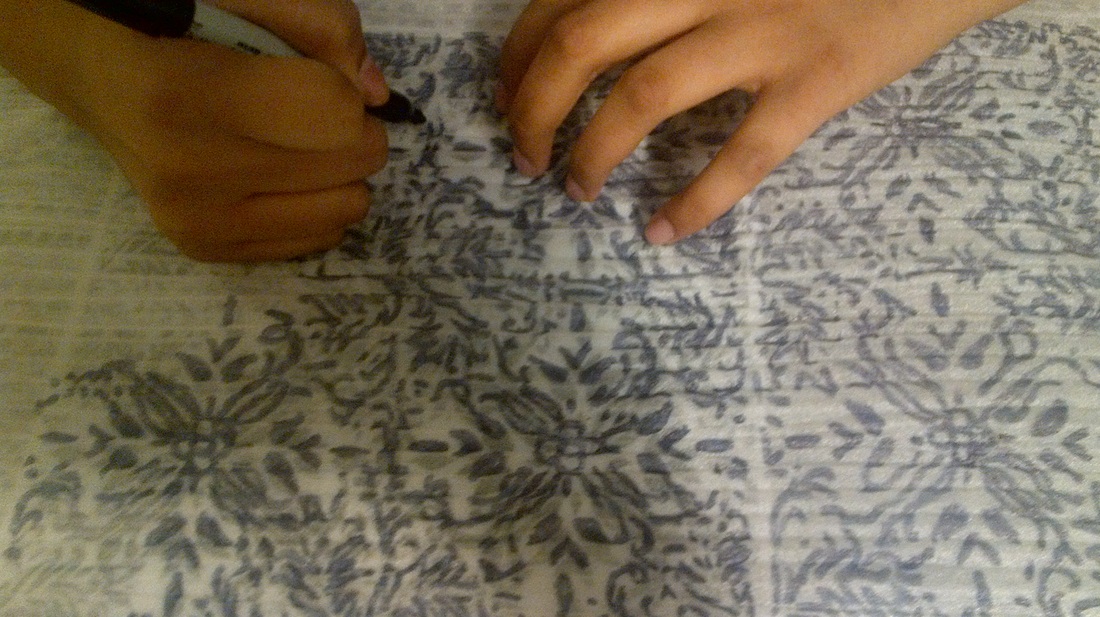
I have begun the good copy of my work where i took my stencil i made of the design and placed it underneath the styrofoam paper and begun tracing over the designs, i finished the first row, and i am not quite happy with what i have so far because the lines are very thick because of the marker and so i will have to use a new sharpie in order for the lines to come out right. The process is very slow because the styrofoam paper has these vertical bumps on them so it is hard for the lines to come out straite so i have to try and go slow for that to come out right. This took me approximately two days (the whole day after school).
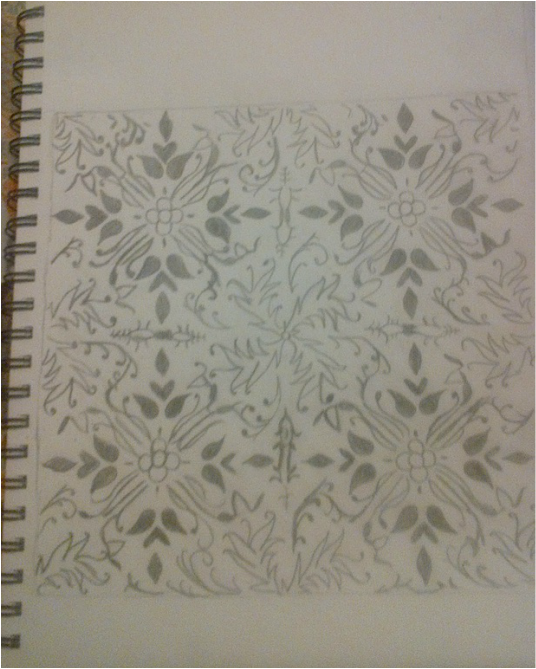
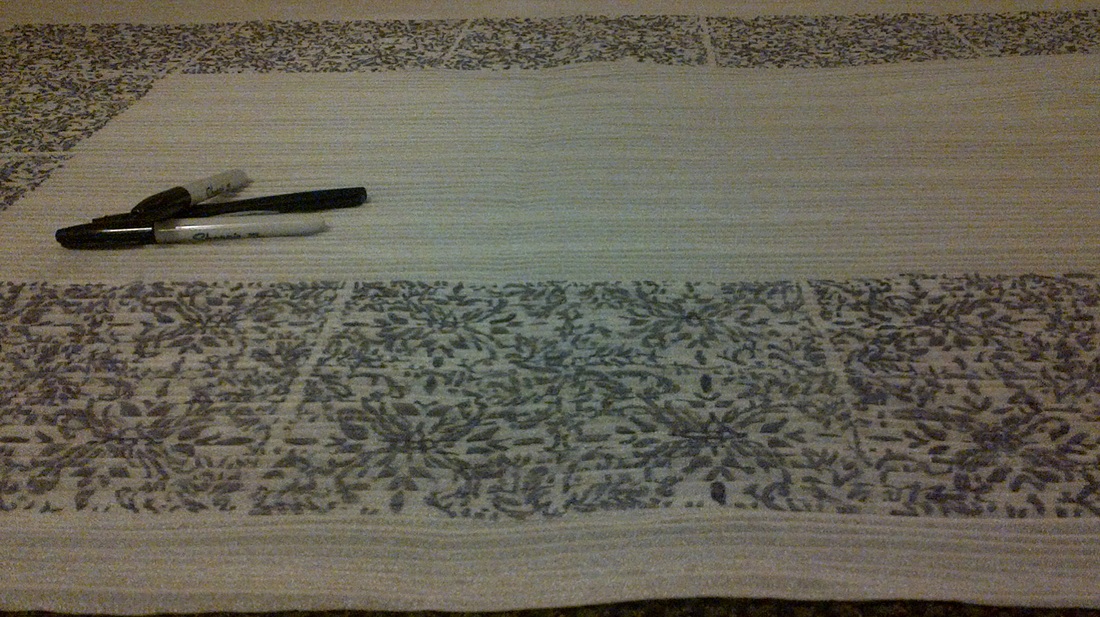
Since i am going to be constructing a border which is made of designs and patterns, and i feel it will have a really cool effect especially on styrofoam paper, i am deciding to draw my designs with a sharpie marker as it will really allow me to create detail and have thin lines where needed because other media might not have worked out. I found a design online in which i liked because i don't exactly know where to start off from, so i found one online and started off with that and then changed some aspects of the designs to my satisfaction and drew it into my sketchbook.
My theme is shapes, patterns and designs, and so i was thinkin of making a border made from designs, I started off with choosing the type of medium i wanted to begin with, and i didn't really want to draw out my art work on regular paper, so i decided to work with a really thin type of styrofoam paper because i thought it would have a really neat effect and its something new i can try out, since i haven't worked with styrofoam before, i thought it would be a great idea and take a risk in trying it out.
